Campaign Settings — also called Advanced Settings or Outreach Settings — give you precise control over who your campaigns reach and when. They cover Inactive Days, Active Time Settings, Blacklists, and Attach Settings, and they can be defined at three levels: Agent, Sender, and Campaign.
👉 The golden rule: Only the settings applied inside the campaign itself are actually enforced. Agent and Sender settings are starting points; the campaign always wins.
How Settings Levels Work
Think of it like a pizza shop:
- Agent Settings are the default recipe every chef follows. New senders inherit these automatically.
- Sender Settings are a chef's personal tweaks. They apply to that sender's campaigns.
- Campaign Settings are the customer's final order. They override everything else.
The Three Levels
| Level | What it does |
|---|---|
| Agent | Default config applied to new senders and existing campaigns when attached |
| Sender | Per-sender config, applied when that sender is used in a campaign |
| Campaign | The active config that controls actual outreach. Always takes priority. |
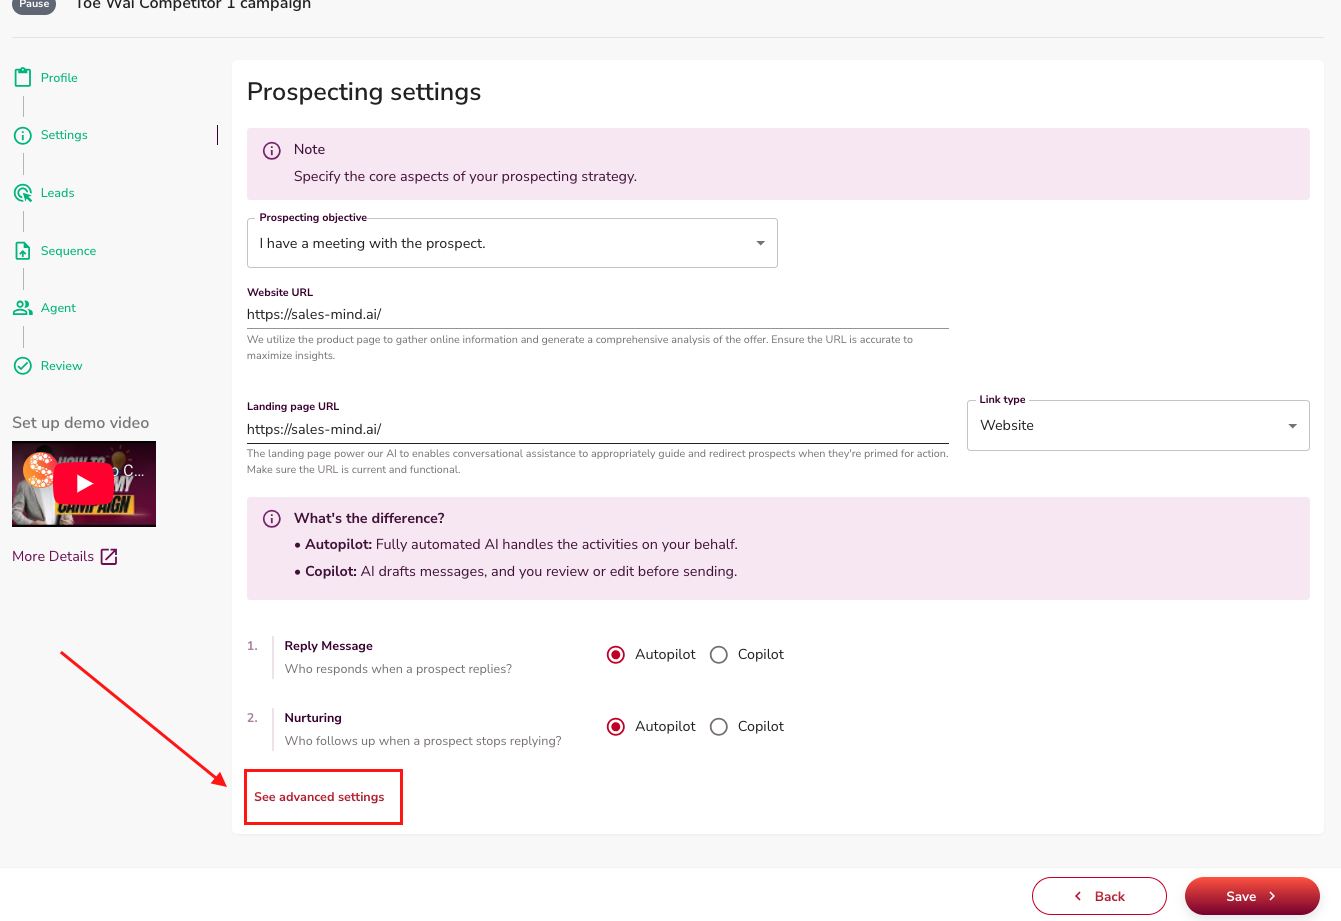
Where to Access Advanced Settings
- From a Campaign: Campaign Creation → Prospect → Advanced Settings
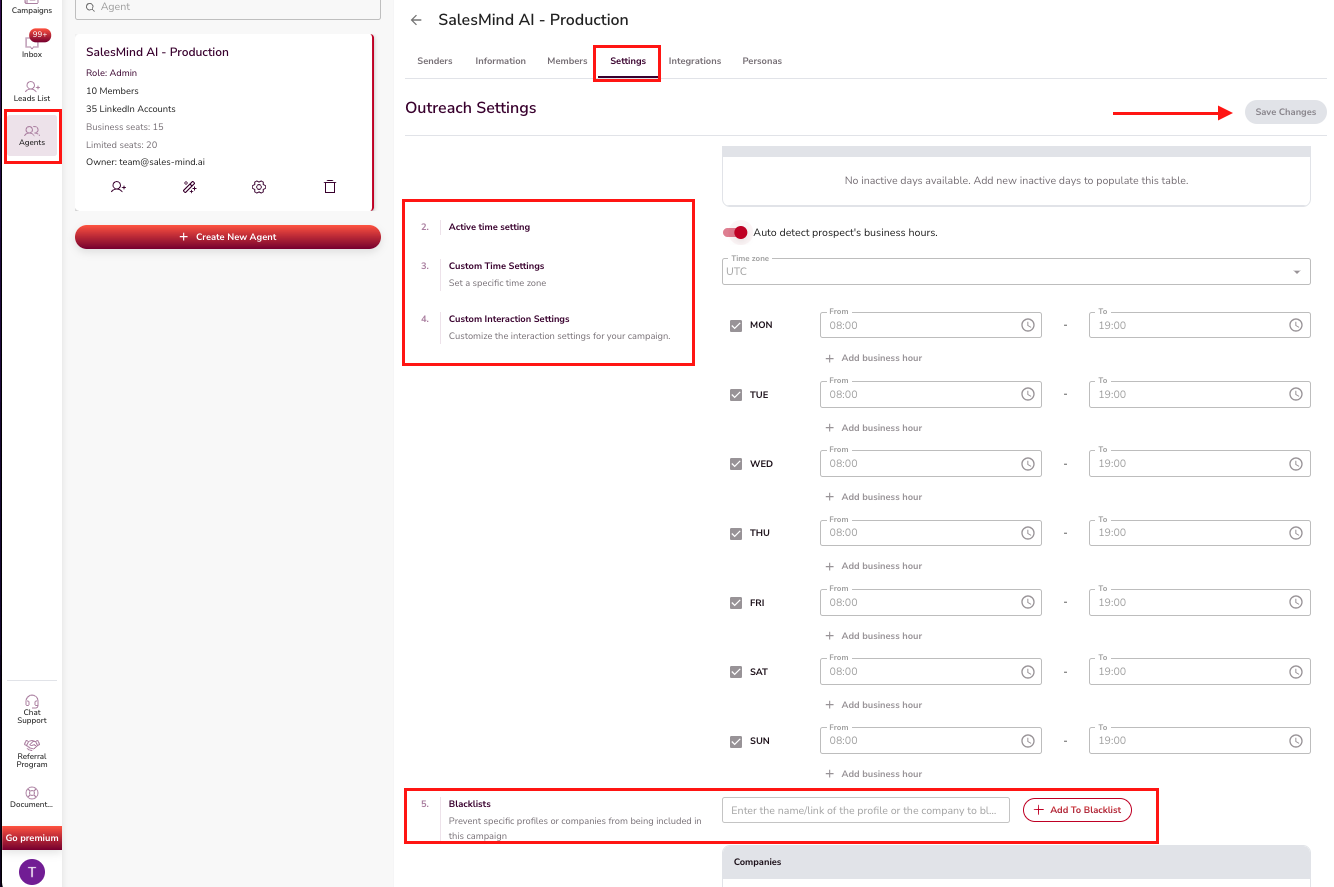
- From an Agent: Agent → Settings
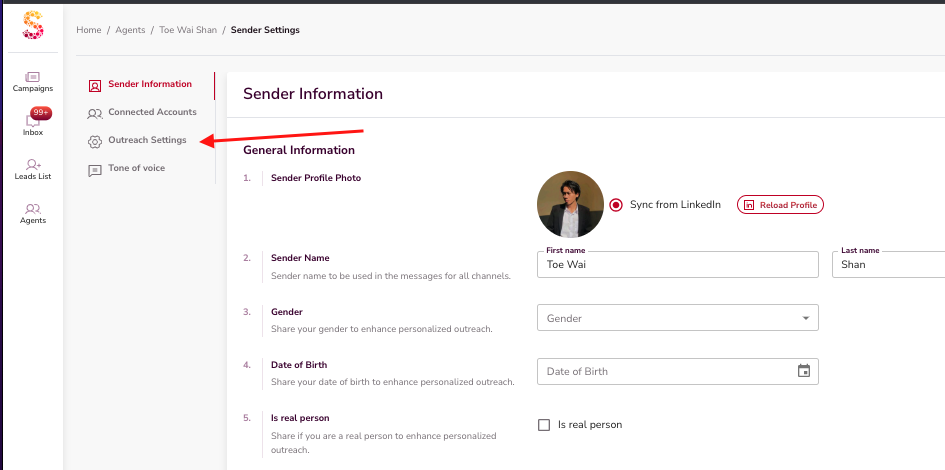
- From a Sender: Agent → Sender Settings → Outreach Settings
A Visual Tour of Each Level
Agent Level
Apply default settings across all senders created under the agent.
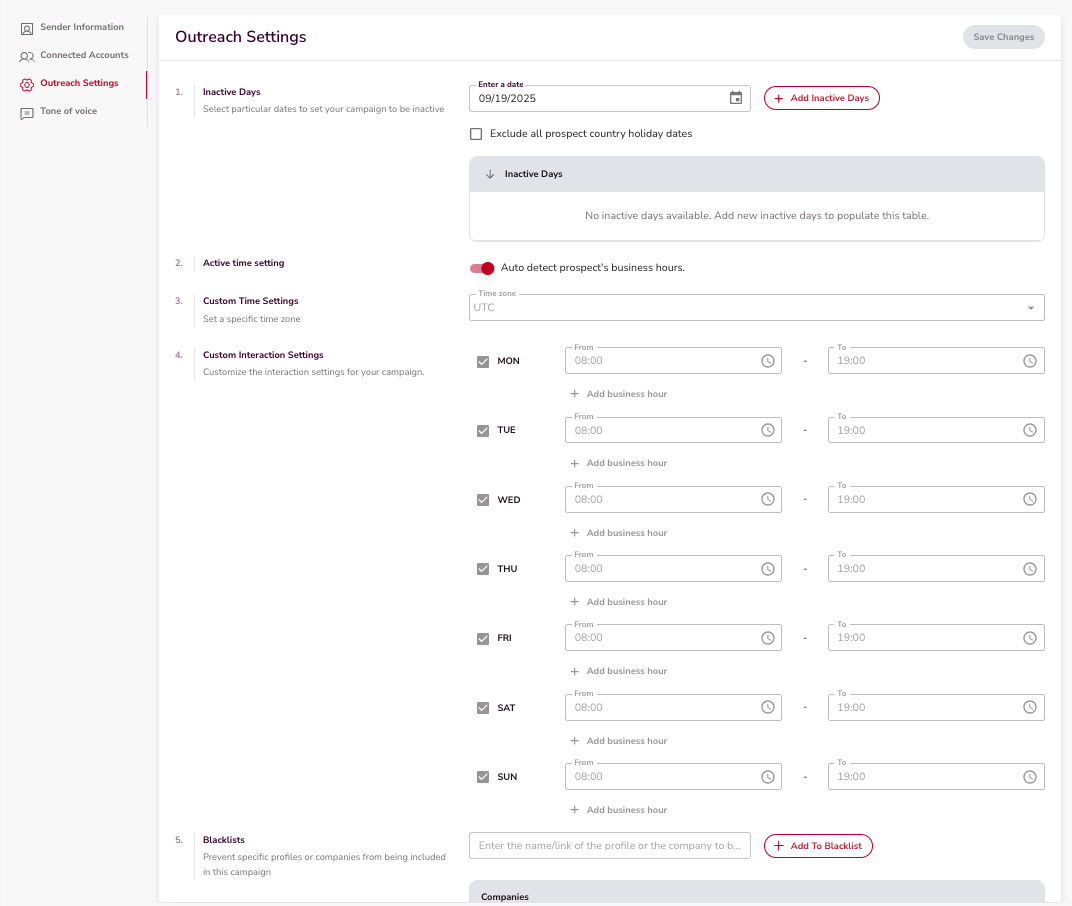
Sender Level
Each sender can have its own settings, which get applied when that sender is used in a campaign.

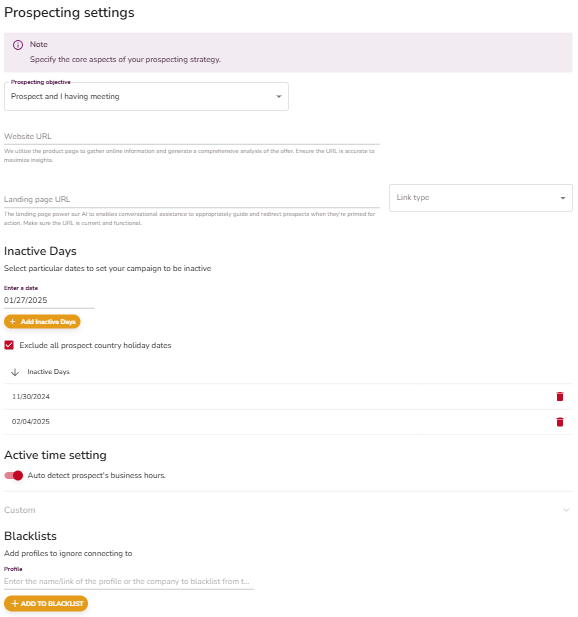
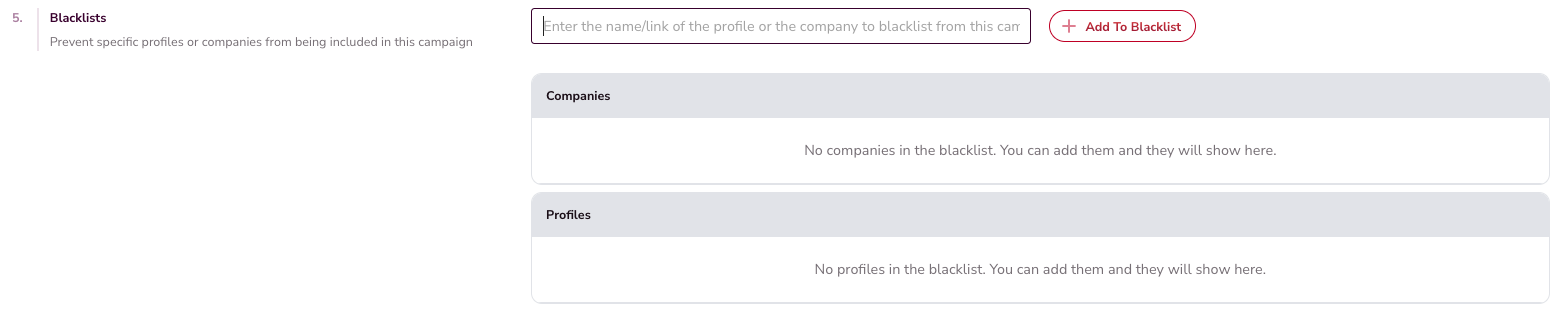
Campaign Level
The active settings that determine actual outreach. Only blacklist entries set here will stop outreach from going through.
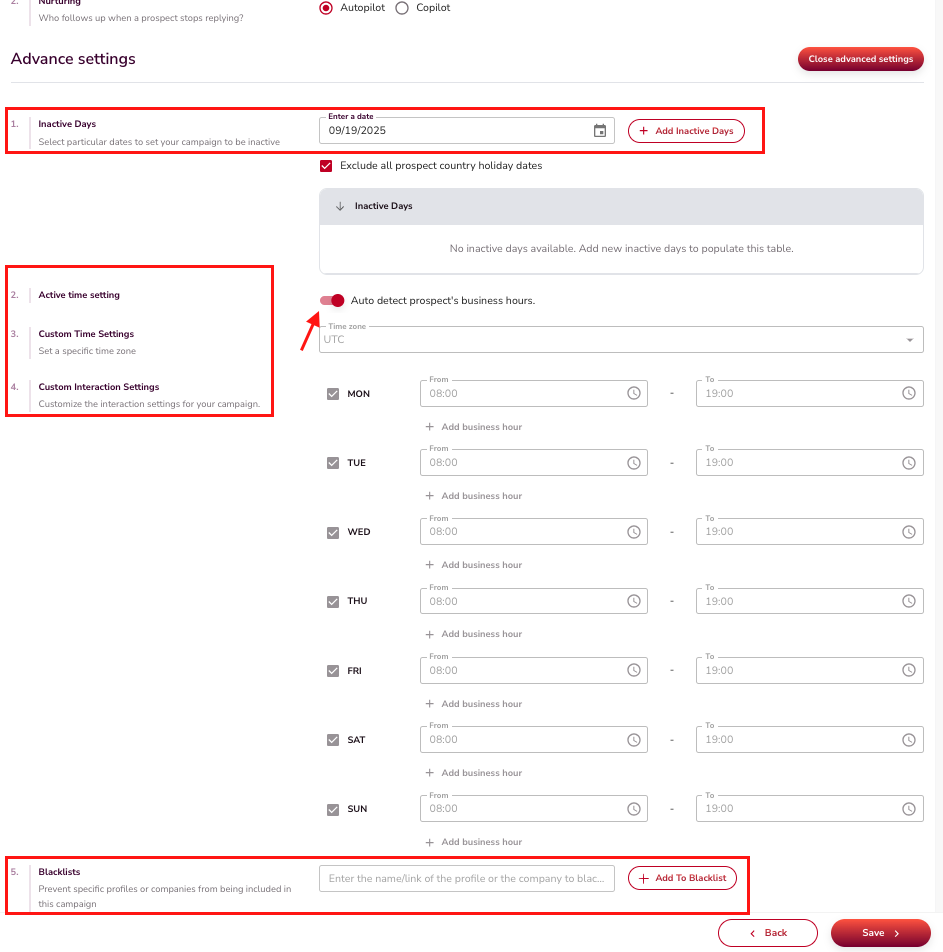
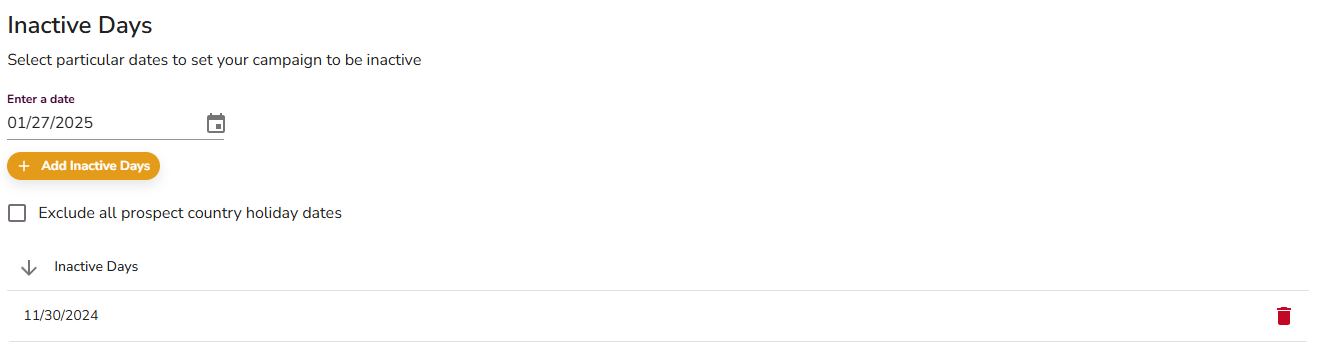
Inactive Days
Inactive Days prevents outreach on non-business days and holidays, keeping your campaigns professional and well-timed.
What it does
- Automatically detects national holidays based on the prospect's country and pauses outreach.
- Lets you add custom dates like company-wide off days or weekends.
How to configure
- Open Advanced Settings.
- Go to the Inactive Days section.
- Select dates to mark as inactive.
- Enable prospect country holiday exclusions or add custom dates.
- Save.
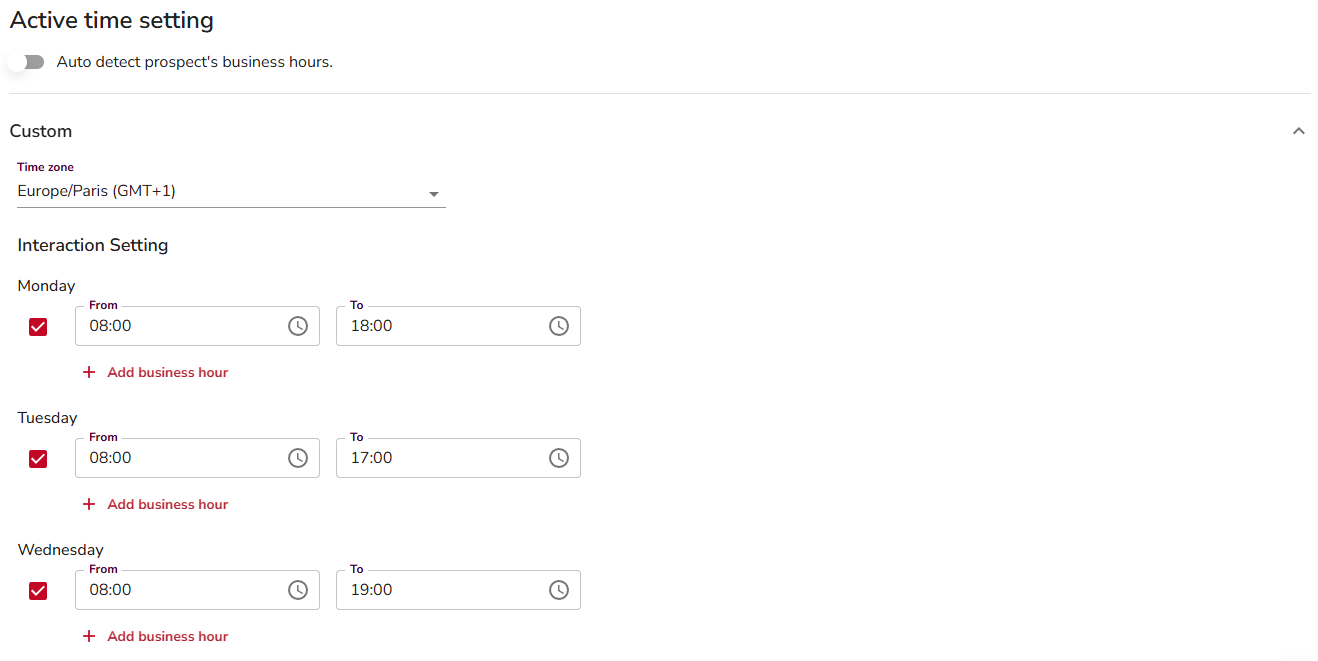
Active Time Settings
Active Time Settings controls the hours your campaign sends messages, so outreach lands when prospects are actually at their desks.
What it does
- AI Detection: Automatically aligns with prospects' local business hours.
- Manual Configuration: Set specific active hours based on your audience or timezone.
How to configure
- Open Advanced Settings.
- Go to the Active Time Settings section.
- Choose AI Detection to auto-detect business hours, or set hours manually.
- Save.
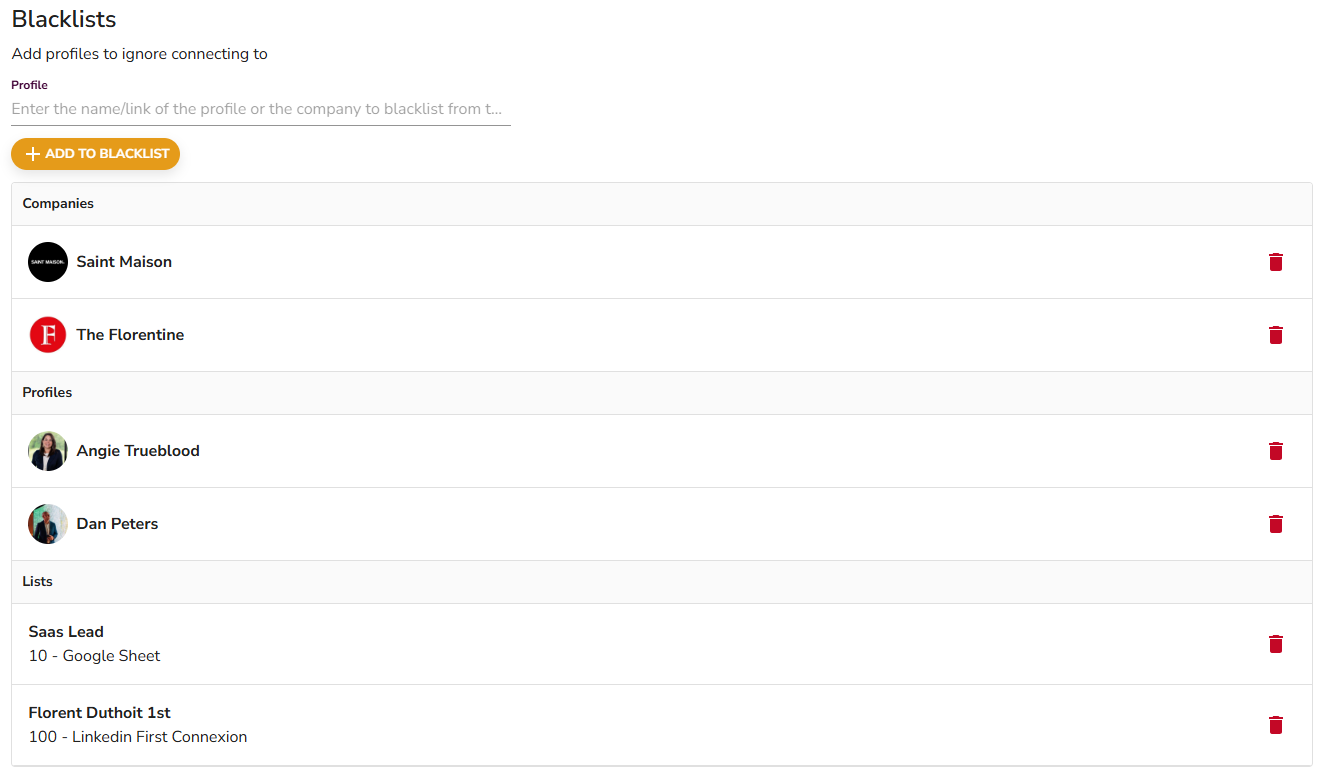
Blacklists
Blacklists let you exclude specific companies, profiles, or lead lists from your outreach so you only reach the right people.
What it does
- Exclude Companies: Block all profiles from a specific company.
- Exclude Profiles: Block individual LinkedIn profiles.
- Exclude Lead Lists: Block entire lists from being contacted.
How to configure
- Open Advanced Settings.
- Go to the Black Lists section.
- Add exclusions by specifying companies, profiles, or lead lists.
- Save.
Practical Walkthrough: Excluding a Competitor
To exclude a competitor from being contacted:
- Add the competitor's company or profile link to your blacklist.
- Save the changes.
- Confirm the blacklist entry is attached to the campaign's outreach settings.
⚠️ Warning: Blacklist entries only take effect when applied at the campaign level. If a competitor is blacklisted at the Agent or Sender level but not inside the campaign settings, outreach will still go through to them.
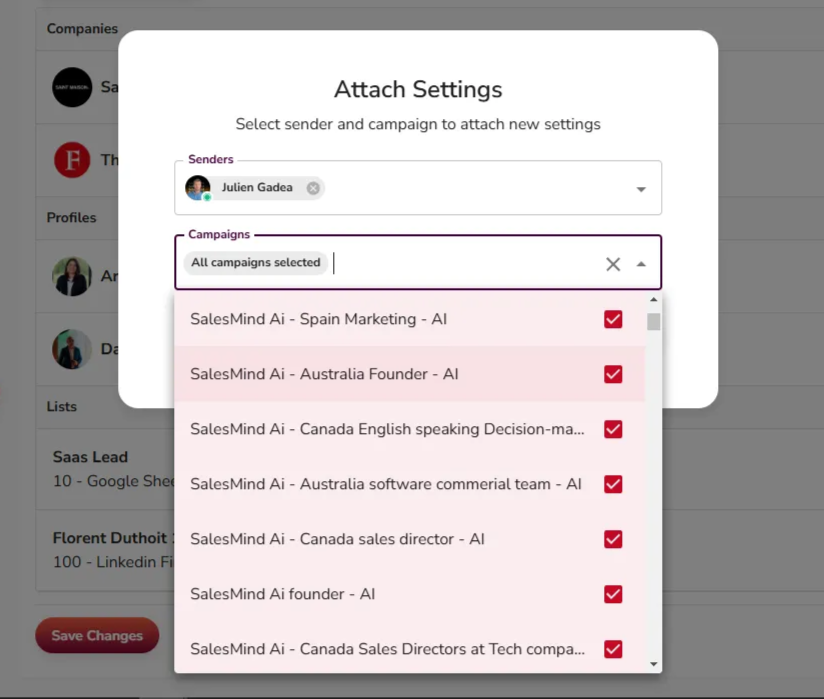
Attach Settings
Attach Settings lets you apply a saved configuration to multiple campaigns at once, saving setup time and keeping things consistent.
👉 Note: This step is optional. You can skip it if you're configuring each campaign individually.
What it does
- Apply Blacklists, Active Times, or Inactive Days to multiple campaigns or senders in one action.
- Quickly push predefined settings to new campaigns.
- Push blacklist changes across all campaigns and senders at once for consistency.
How to configure
- Open Advanced Settings.
- Save changes in any feature (Blacklists, Inactive Days, or Active Time Settings).
- When prompted, select the campaigns or senders to receive the settings.
- Save.
How Settings Propagate
When you create a new campaign with a sender:
- The sender's settings are automatically applied to the campaign.
- If the sender has no settings, the campaign defaults to the agent's settings.
- You can also push blacklist changes across all campaigns and senders at once for consistency.
Key Takeaways
- Campaign settings exist at three levels (Agent → Sender → Campaign), but only campaign-level settings are enforced.
- Always verify that your blacklist entries (competitors, unwanted profiles) are included in the campaign itself.
- Use Inactive Days and Active Time Settings to make outreach feel timely and professional.
- Use Attach Settings (bulk propagation) to keep settings consistent across campaigns and senders.
What's Next
- See the full Campaign Creation: Step-By-Step Guide for a walkthrough that puts these settings in context.
- Learn how to Manage an Agent in SalesMind AI to set sane Agent-level defaults.