SalesMind AI campaigns let you automate LinkedIn outreach with the right objectives, lead sources, and message sequences. This guide walks you through every step.
Prerequisites
- A connected LinkedIn account (sender profile)
- A website URL or document describing your offer
- Leads ready to import (or a plan for which source to use)
1. Start a New Campaign
- Go to the Campaigns page and click Create new campaign at the bottom.
- If you don't see the button, scroll down.

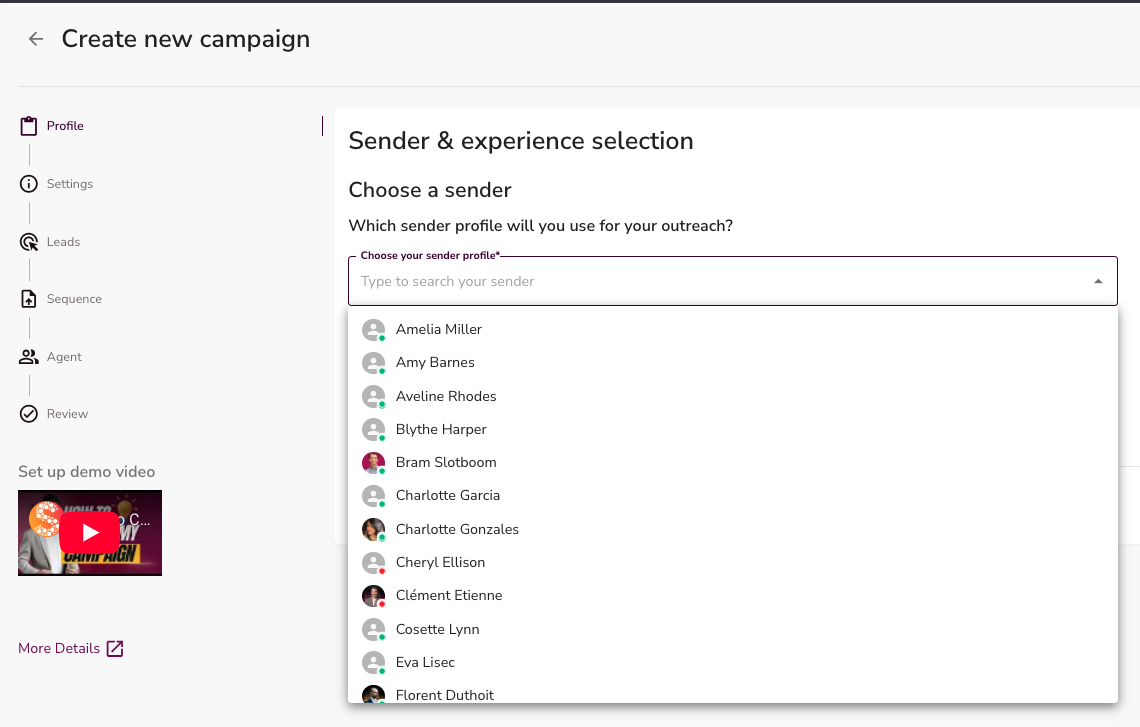
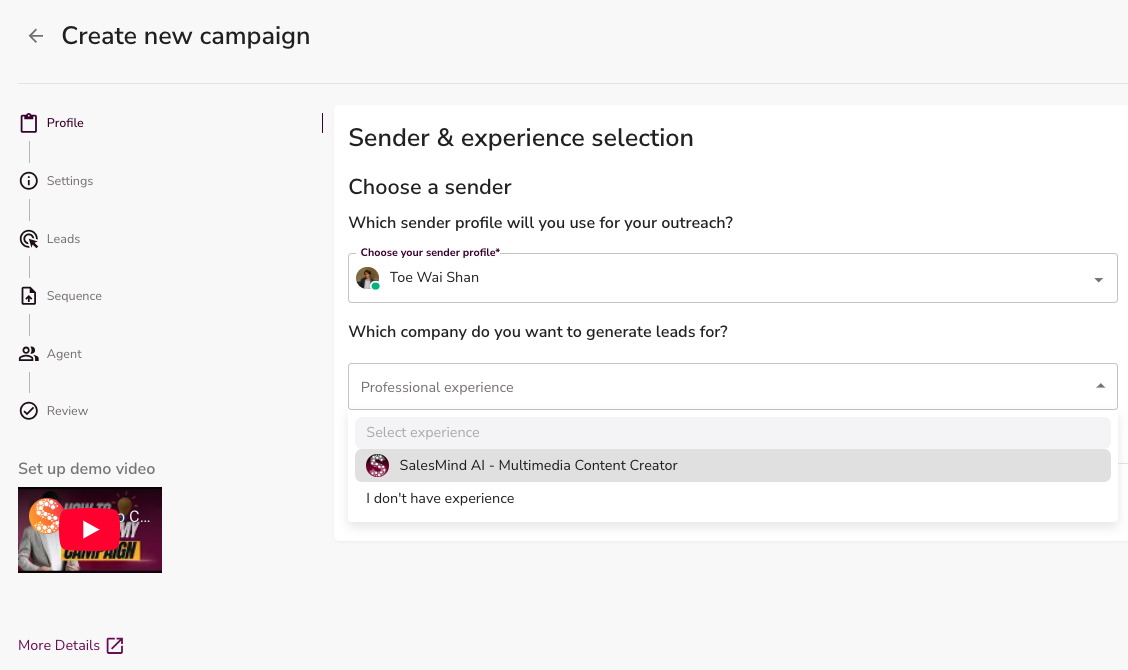
2. Choose a Profile
- Select which Sender profile to use.
- SalesMind AI automatically pulls experience details from the LinkedIn profile.
- If no experience appears, choose I don't have experience, or add experience on LinkedIn. Then click Refresh to update the SalesMind AI page.
3. Define Your Objective
Pick the goal that matches your outreach:

- Book meetings with prospects
- Capture prospect contact information
- Drive traffic to your website
- Get sign-ups for your application
- Invite prospects to an event
- Encourage prospects to apply for a job
👉 Note: Add your Website URL here. The AI reads it to understand your product and write better messages.
About the Website URL
The Website URL is where the AI learns about your offer. It doesn't need to be a polished website. It can be:
- A Google Doc
- A Notion page
- A simple landing page
- Any link that explains what you do
The AI uses this link to learn your product, its benefits, selling points, pricing, and competitors. Prospects never see this link.
4. Set Conversion Links
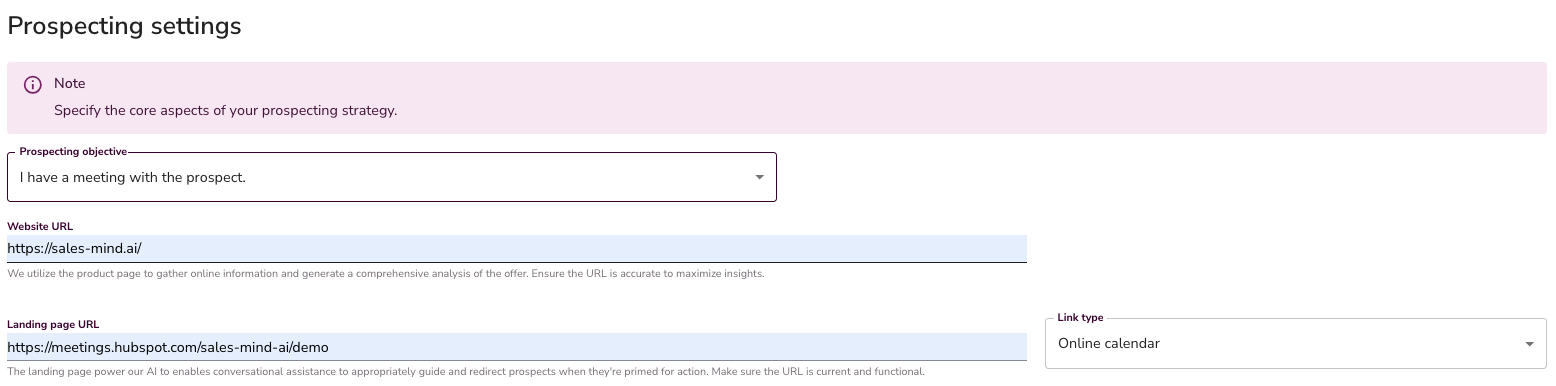
Match your objective to the right link:
- Book a meeting calendar link
- Capture contact info leave blank or use a form
- Drive traffic website URL
- App sign-ups signup page link
- Event registration event page or form
- Job recruitment job description or careers page
About the Landing Page URL
The Landing Page URL is optional. Here's how it affects your messages:
- Without a booking link: AI writes something like "Are you free next week for a call?"
- With a booking link: AI writes something like "Are you free for a call? Here's the link to book."
👉 Note: Only the Landing Page URL can be left empty. The Website URL must always contain information about your company.
👉 Note: When a Landing Page URL is set, the AI must place it in your final call-to-action message. Make sure your sequence instructions allow a link there (see the sequence design rules in step 8).
5. Engagement and Lead Handling
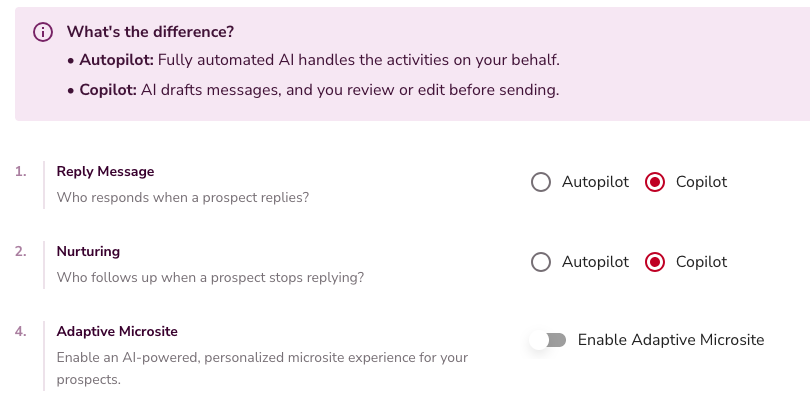
Choose how the AI handles replies:
- Copilot: AI drafts replies, you review and send.
- Autopilot: AI drafts, qualifies, and replies automatically within 3 to 10 minutes.
- Both modes handle nurturing: if a prospect doesn't respond after 7 to 30 days, the AI follows up.
Adaptive Microsite
Adaptive Microsite is an AI-generated personalized page created for each lead. It replaces static outreach with dynamic content that builds interest, qualifies prospects, and keeps buyers and sellers aligned.
It includes tailored Buyer and Seller views, plus a built-in SalesMind AI Inbox for direct, contextual conversations. Fully branded and adapting in real time.
💡 Tip: Enable Adaptive Microsite to boost engagement, qualify leads faster, and move prospects further down your funnel.
📖 Read more: Adaptive Microsites: How They Work & How to Use Them
6. Apply Outreach Settings
- Set active days and hours for outreach.
- Exclude holidays by prospect country.
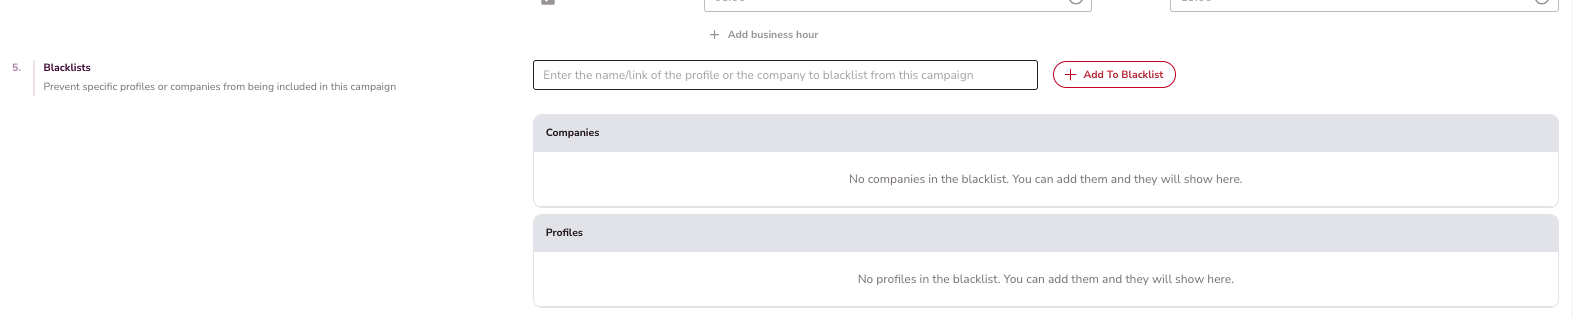
- Maintain a blacklist of contacts to avoid.
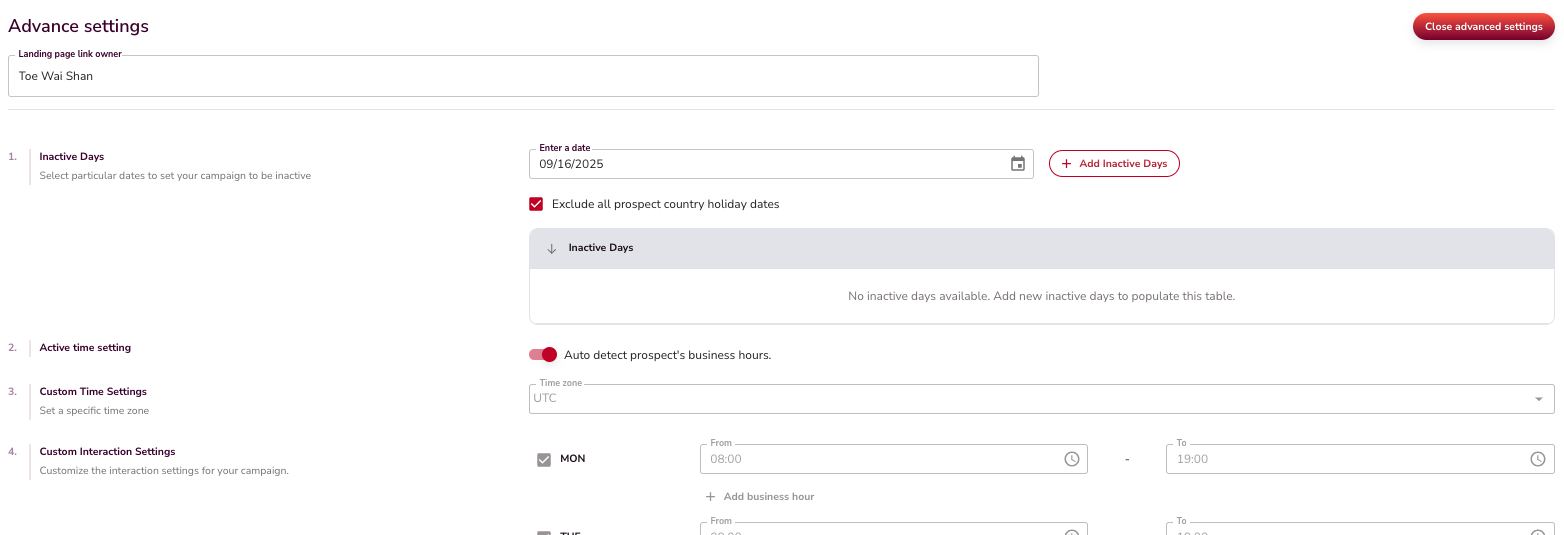
- Enable duplicate protection so prospects aren't contacted by multiple team members.
7. Import Leads

Choose your lead source:
- AI Lead Finder: Build lists using persona templates, job titles, seniority, location, and industry filters. → Full guide
- Sales Navigator: Paste a saved search URL (up to 1,500 leads per import). → Full guide
- LinkedIn People Search: Use keywords, logic operators, and filters. → Full guide
- Company Followers: Import followers of a LinkedIn page or people engaging with company posts. → Full guide
- Event Attendees: Import up to 1,500 people from a LinkedIn event. → Full guide
- Google Sheets: Import LinkedIn profile URLs from a public sheet. → Full guide
- Saved Lists: Reuse lead lists you've already created. → Full guide
8. Build the Sequence
Your sequence is the series of touchpoints sent to each lead. There are three parts to it: pick a structure, lay out your touchpoints, and decide how each message is written.
Choosing a sequence structure
When building your sequence, you first choose a preset or start from scratch:
- Presets (recommended): Ready-made sequences that include pre-written messages you can edit, along with a defined number of steps, touchpoint types, and timing between them. See Pick Your Template to find the right one in under a minute.
- Build from scratch: Add each step manually, write your own messages, and define the timing yourself.
💡 Tip: Presets give you a complete starting point. You can edit every message and step to match your voice and goals.
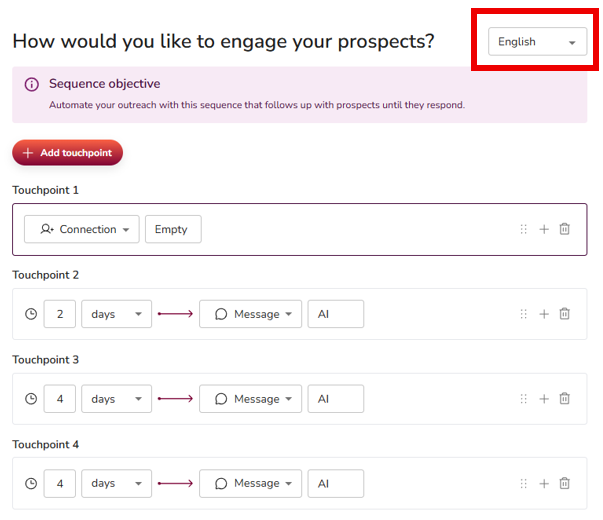
Choosing the message language
At the top of the sequence step, you can choose the language in which your messages will be sent. You have two options:
- Pick a specific language (English, Dutch, Spanish, Portuguese, etc.): Every message in the sequence will be sent in that language to every lead.
- Leave the field empty: The system automatically uses Auto-detect prospect's language, sending each lead messages in their own language based on their LinkedIn profile.
This setting works the same way whether you built your own sequence or picked a template.
💡 Tip: You can change the language at any time, even after the campaign is live. Just return to the Sequence tab inside your campaign and select another language.
Build your own sequence
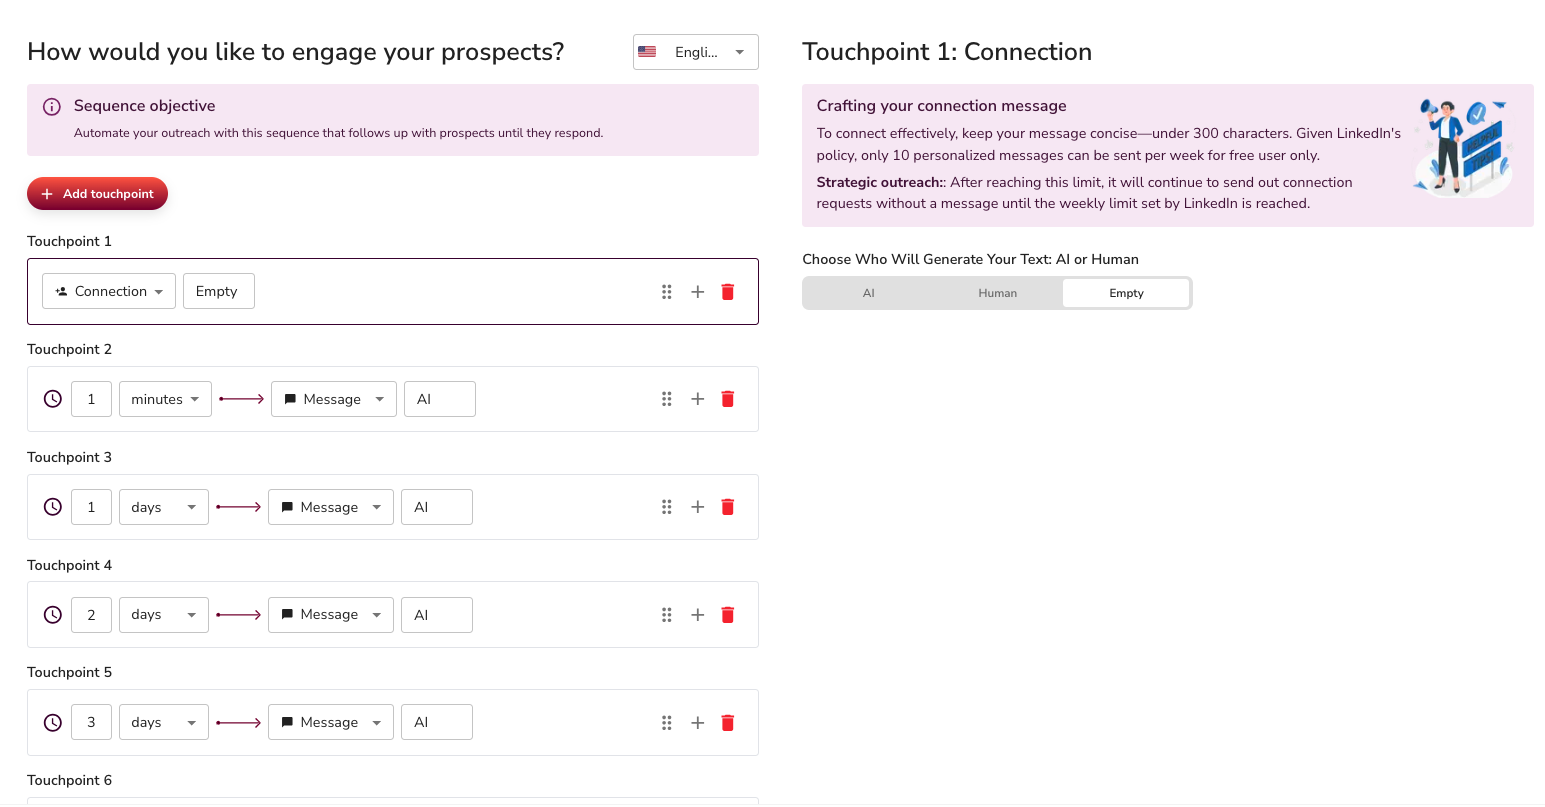
Start your sequence with a Connection Request (recommended: leave the message empty).
Why empty?
- Free LinkedIn accounts only get 10 personalized connection messages per week. An empty request saves those credits.
- An empty request encourages prospects to visit your profile, consume your content, and learn about your solution before you ever message them.
- By the time your follow-up arrives, they already know who you are.
⚠️ Warning: This strategy only works if your LinkedIn profile is strong and optimized.
Campaigns automatically skip:
- Existing connections (1st network) when your sequence includes a connection request
- Out-of-network contacts (2nd and 3rd network) when the sequence is message-only
💡 Tip: Whether or not you include a connection request as a step determines which LinkedIn network you target - include one to reach 2nd and 3rd-network prospects, or skip it to only message your existing 1st-network connections.
After the connection request, add 4 to 6 touchpoints over 1 to 3 weeks with short, natural follow-up messages.
Choosing how each message is written
Inside every step, you decide who writes the message: AI or Human. This choice changes what you put in the message field.
- AI: You give the AI instructions, not the message itself. Treat the text box as a brief - bullet points, talking points, tone guidance, anything that tells the AI what to convey. At send time, the AI treats your text as guidance and rewrites it in its own words, fully personalized for each individual lead based on their LinkedIn profile. Click Generate to preview an example of what the AI will produce. To change the output, edit your instructions and click Generate again.
- Human: You write the exact message that will be sent. The system delivers it word-for-word to every lead - no AI rewriting, no personalization. You can either pick one of our preset messages or type your own. Use this mode whenever you want the same precise wording sent to every single lead.
👉 Note: The Generate button only produces a preview of an AI message. It has no effect on Human messages.


Designing a sequence that passes quality checks
Every AI message is reviewed for quality before it ships (see Understanding Message Quality Checks). A few design rules prevent almost all rejections - and make sequences convert better:
- One question per message. Ask exactly one thing. If a message needs a linking sentence before the ask, write it as a statement, not a second question.
- One clear ask at the end. The last line before the signature should be the call to action (usually a short meeting ask). Do not stack a vague question and a meeting ask in the same message.
- Give your link one home. If your objective involves a website, booking, or event link, exactly one message step should carry it - and its instructions should say so explicitly ("End with this exact link: ..."). Do not forbid links in every step while the campaign objective requires one; that contradiction causes repeated rejections.
- Declare deliberate soft closes. A final break-up message should contain no ask, no question, no link. Tell the system it is intentional by adding the marker
NO_CTAon its own line in that step's instructions. This works in any language. - Early steps build trust, late steps ask. Meeting requests or links in the first messages trigger quality warnings. Lead with an observation or a question, ask later.
- Keep it human and short. 25-45 words per message, plain words, no corporate cliches or AI-sounding filler ("caught my attention", "this shows a commitment", "is key"). English messages are also scored for readability (target grade 5-7).
- Check the timing. Delays count from the previous step. A common mistake is a long delay before the second-to-last message and one day before the final one, when the reverse was intended.
💡 Tip: After editing step instructions, click Generate to preview what the AI produces and confirm it matches your intent before launching.
📖 For more details, view here:
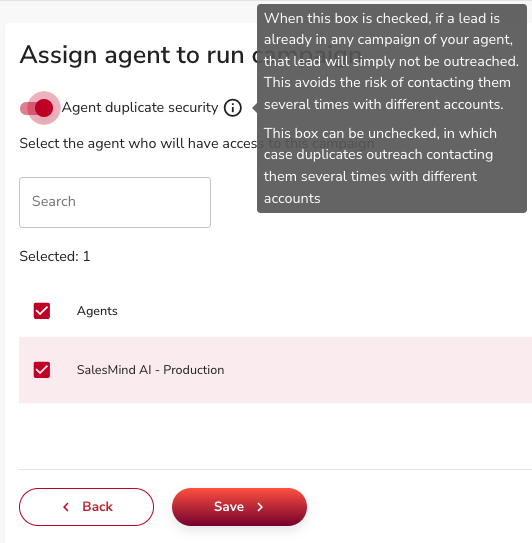
9. Manage Agent and Access
- Use Agent Duplicate Security to prevent multiple senders from contacting the same lead.
- Share the campaign with other agents or teams if needed.
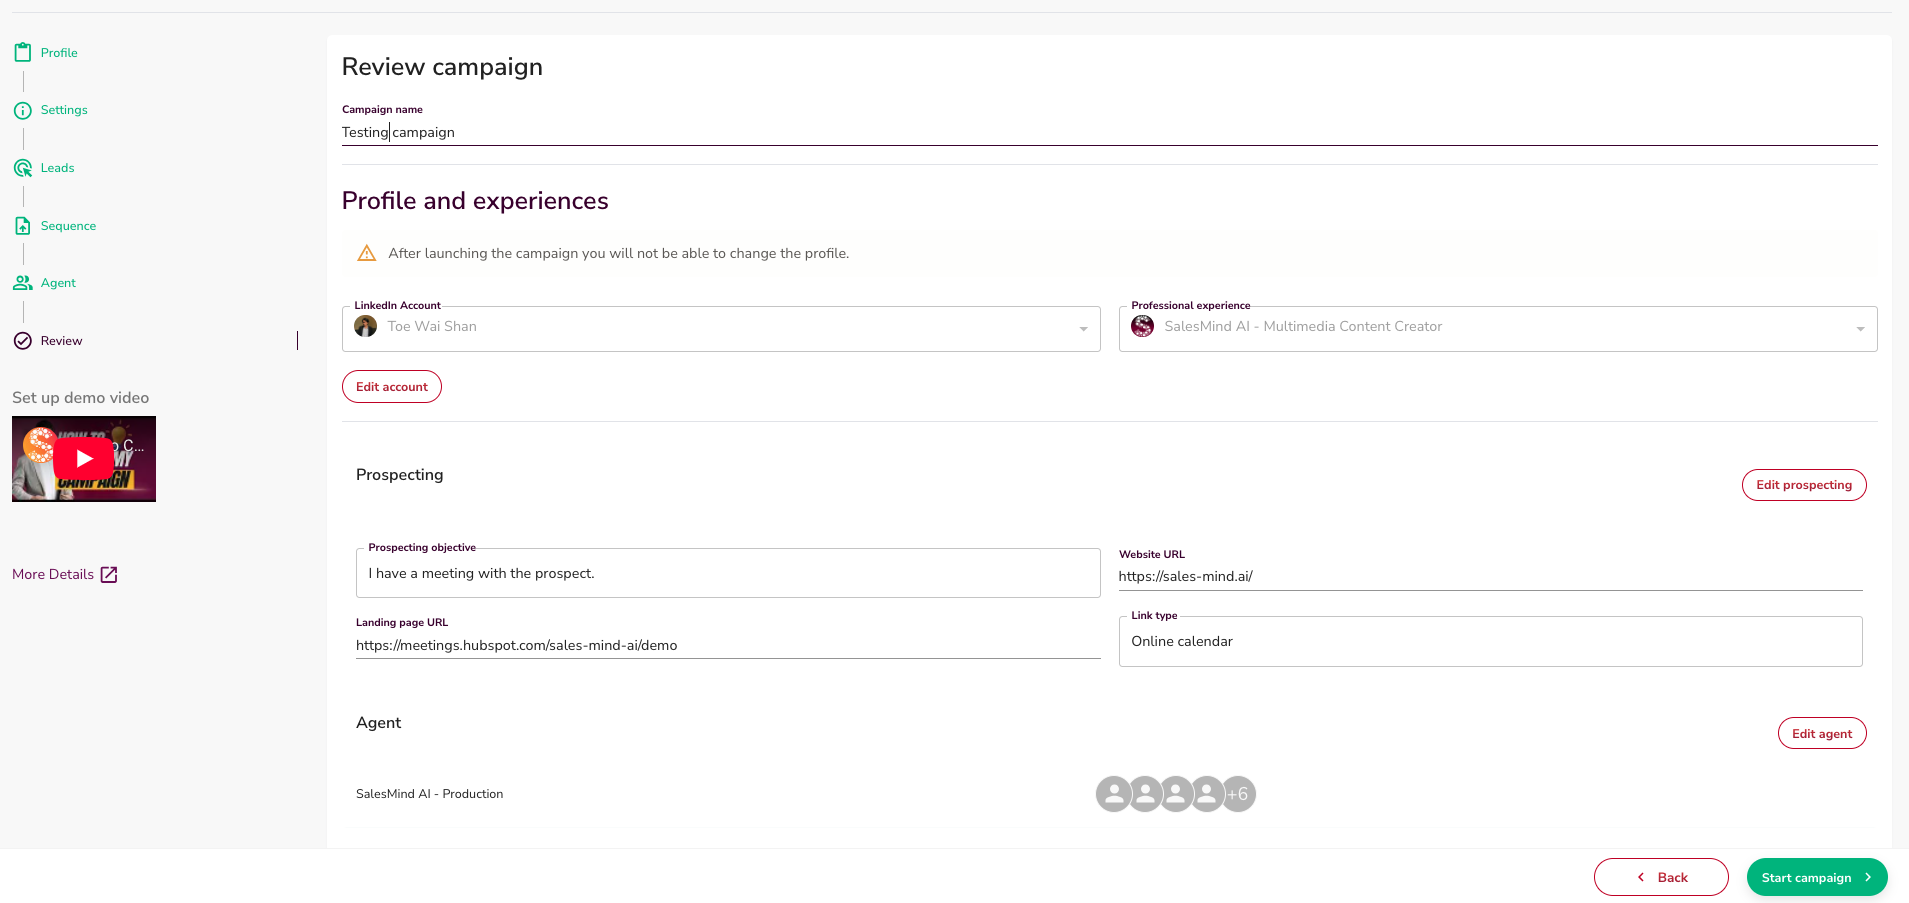
10. Review and Launch
- Review all steps on the summary page.
- Name your campaign.
- Save as a draft or click Launch to start sending.
What's Next
- Learn how to import leads with AI Lead Finder
- Understand conditions and delays in your sequence
- Set up Outreach Settings for blacklists and active hours