This guide covers every step from sign-up to your first campaign launch. Follow along and you will be ready to start outreach in under an hour.
1. Create Your Account
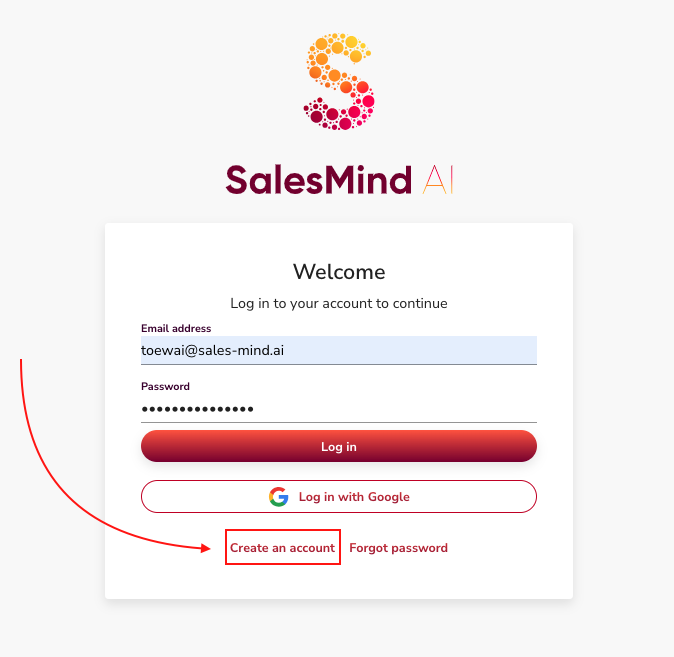
Go to the SalesMind AI registration page. Create your account with your email address.
Once signed in, you can start setting up your first agent.
2. Set Up Your Agent
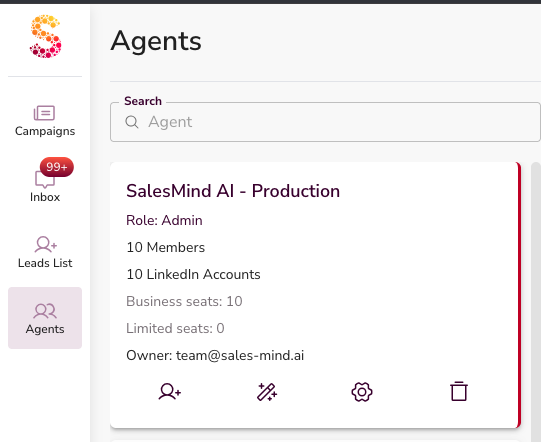
An Agent is your main workspace in SalesMind AI. Everything lives inside an agent:
- LinkedIn senders
- Personas
- Missions
- Campaigns
👉 Create one agent per company, brand, or client.
2.1 Agent Information
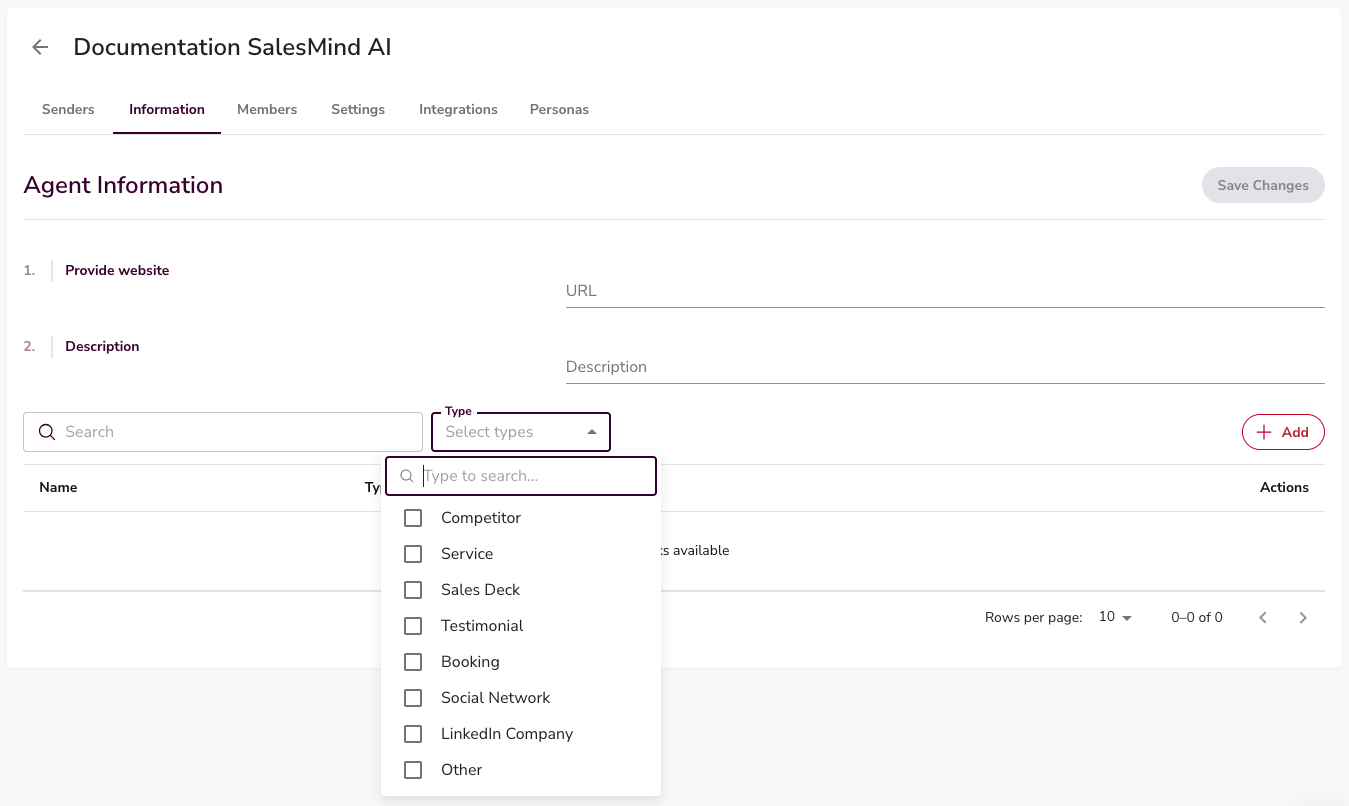
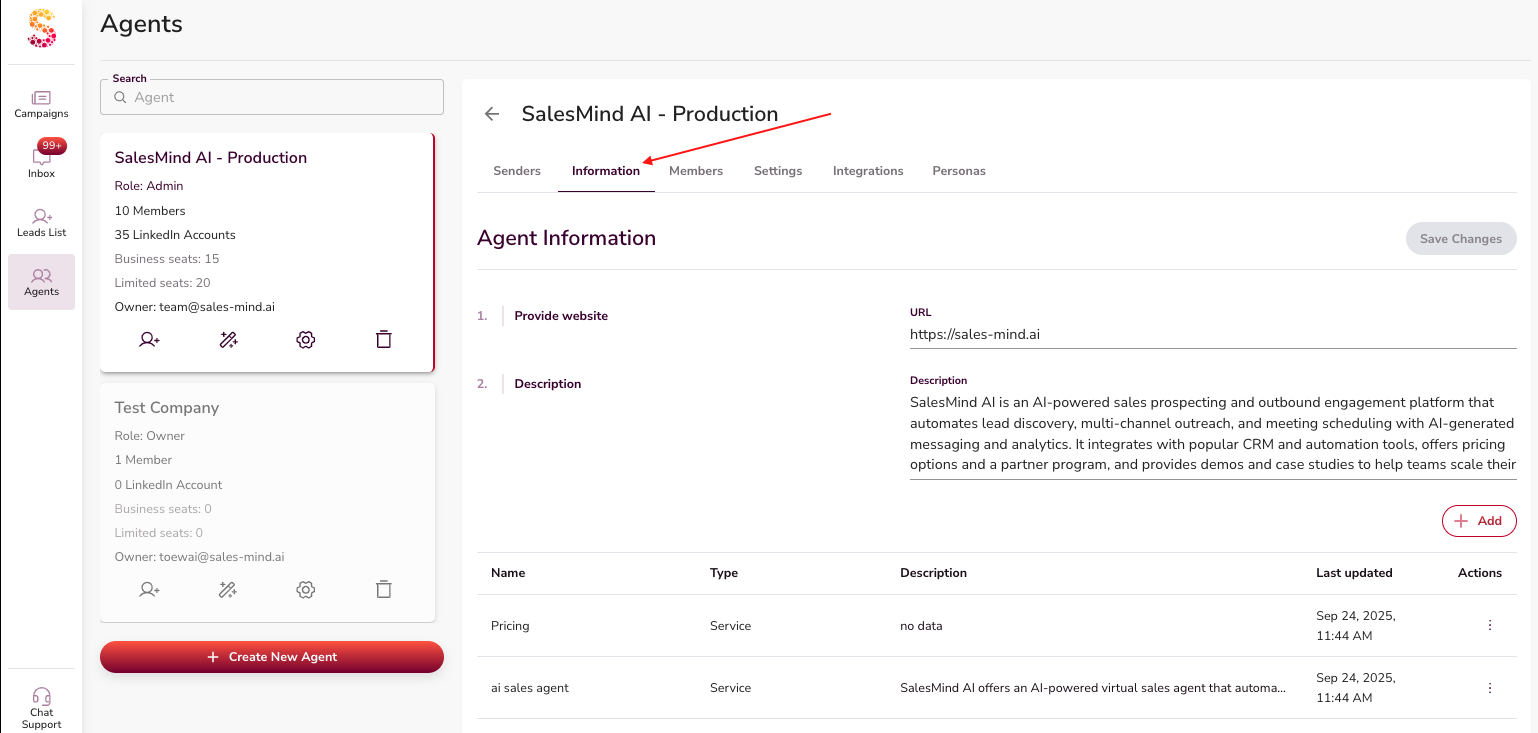
Open your agent and go to the Information tab. Add as much detail as you can — the more context you give, the better the AI represents your business.
At a minimum, fill in:
- LinkedIn company page
- Tailored Sales Playbook
- Brand Tone of Voice
- At least 2 services
💡 Tip: Your Tone of Voice and Tailored Sales Playbook are created on their own once you add your company website.
Add anything else that helps — testimonials, free trials, lead magnets, case studies, or videos. Put these under Resources.
To add a link, go to the Information tab. Then click the + Add button.
2.2 Outreach Settings
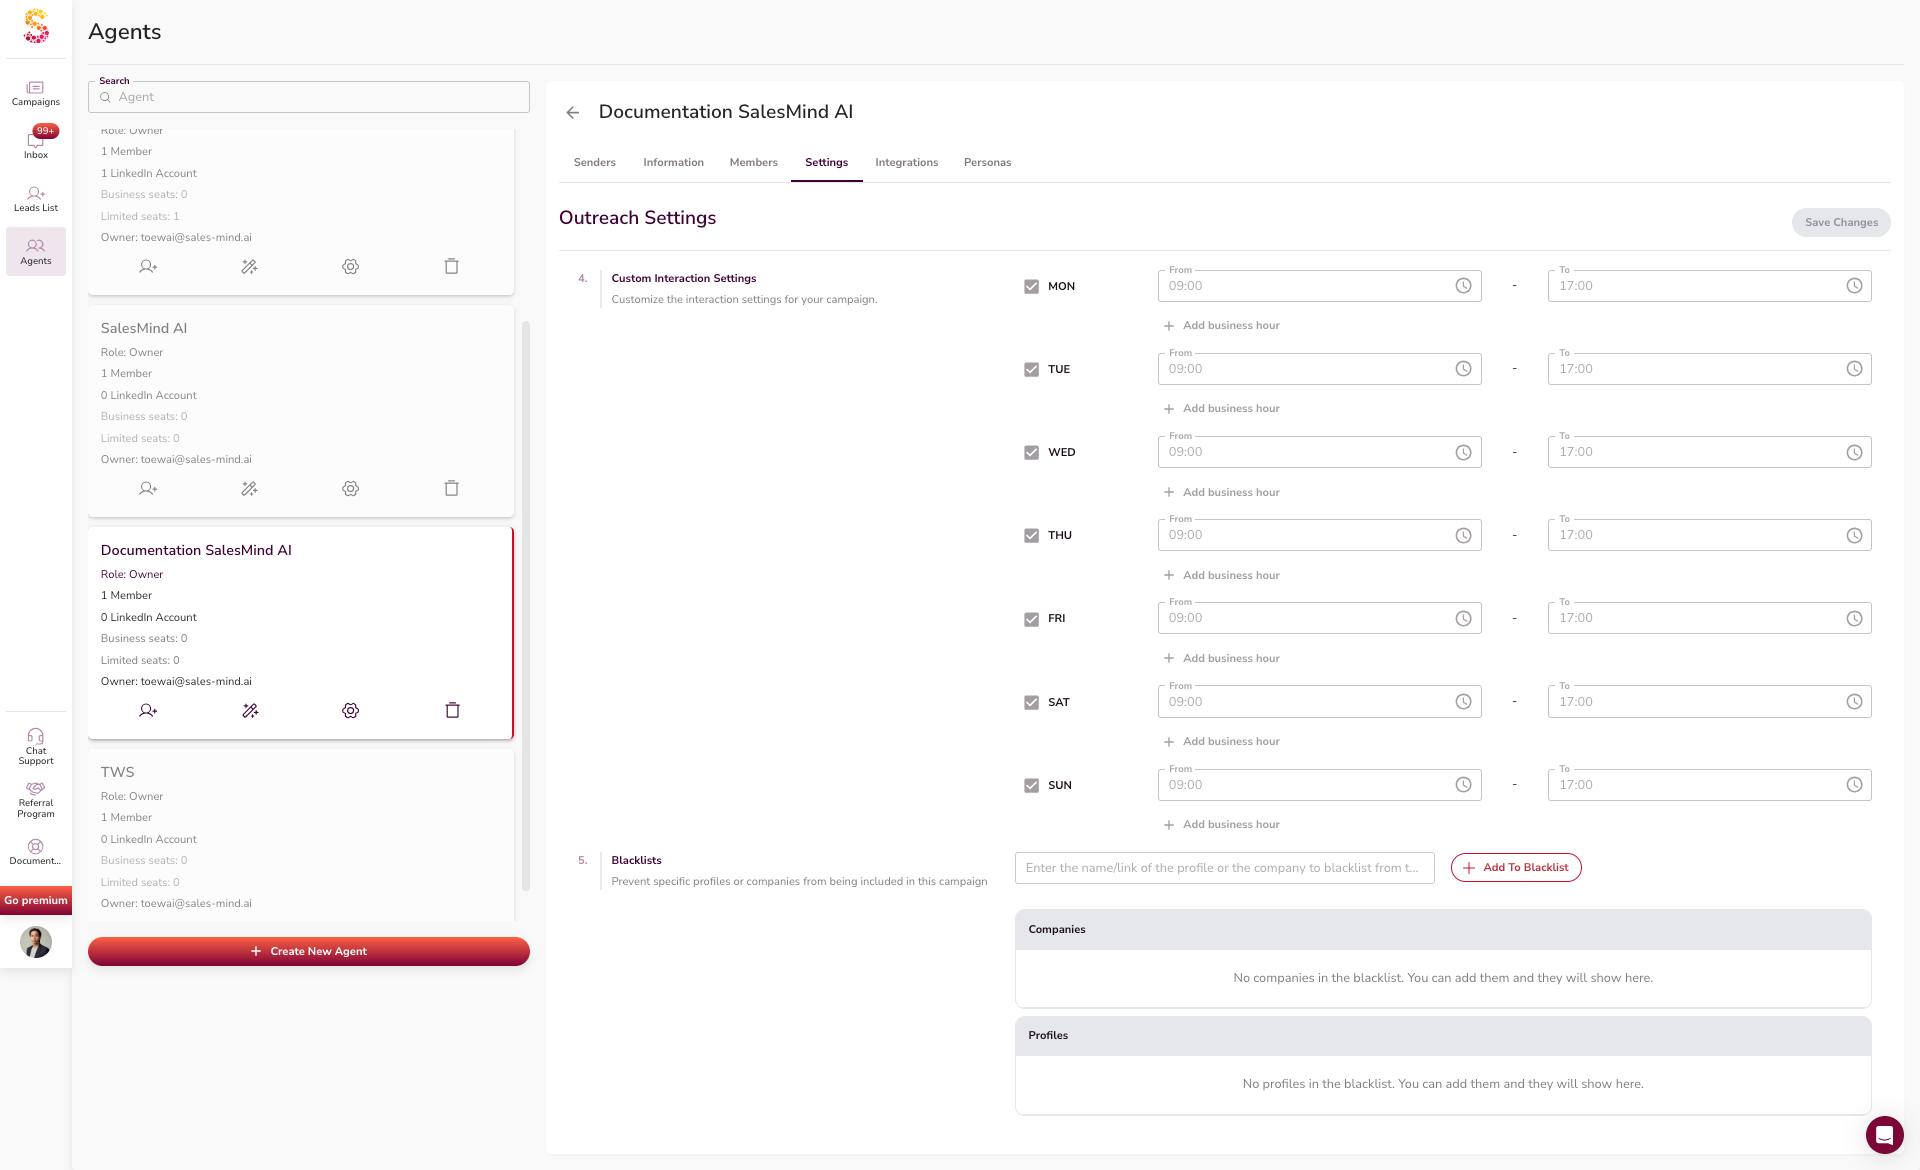
Go to the Settings tab inside the agent. Set:
- Inactive days and holidays
- Business hours or time zone
- Interaction times
- Blacklists to block specific profiles or companies
💡 Tip: Turn on "Auto detect lead's business hours". The AI will only reach out during their work hours. This feels more natural and avoids LinkedIn flags.
These settings apply to all senders under this agent.
3. Connect Your LinkedIn Sender
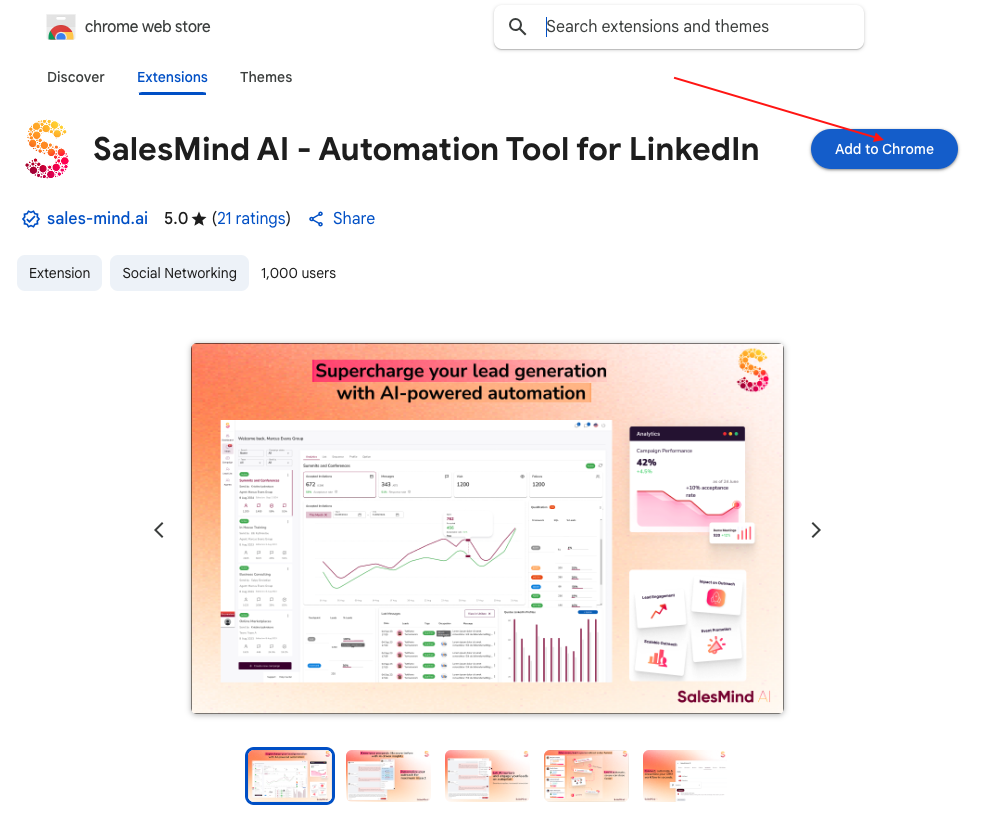
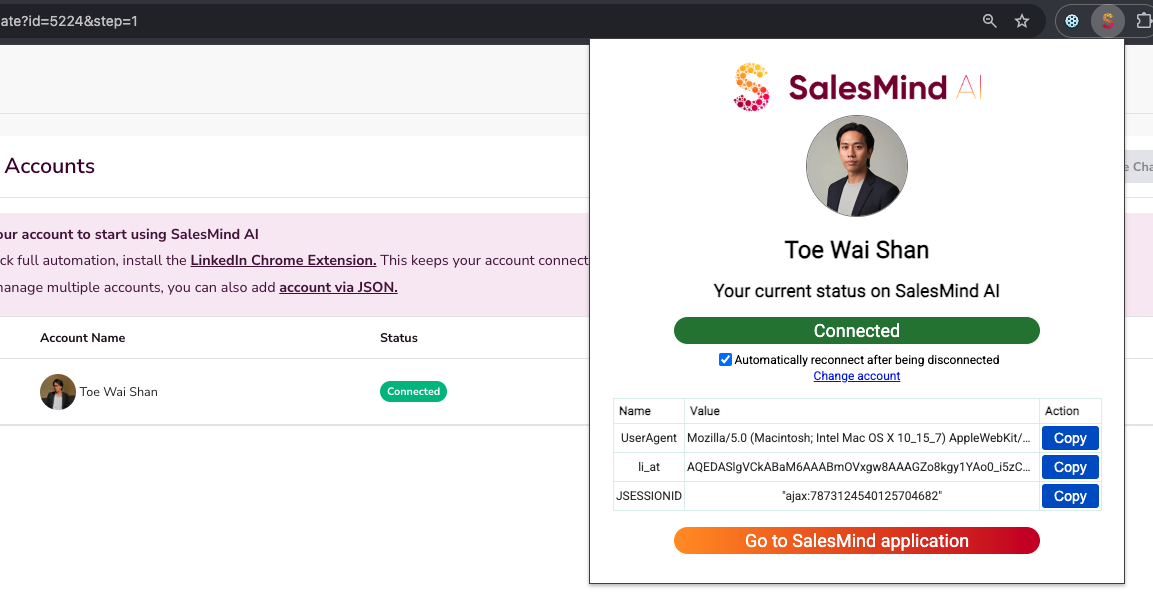
Go to the Senders tab. Install the SalesMind AI Google Chrome Extension to connect your LinkedIn account.
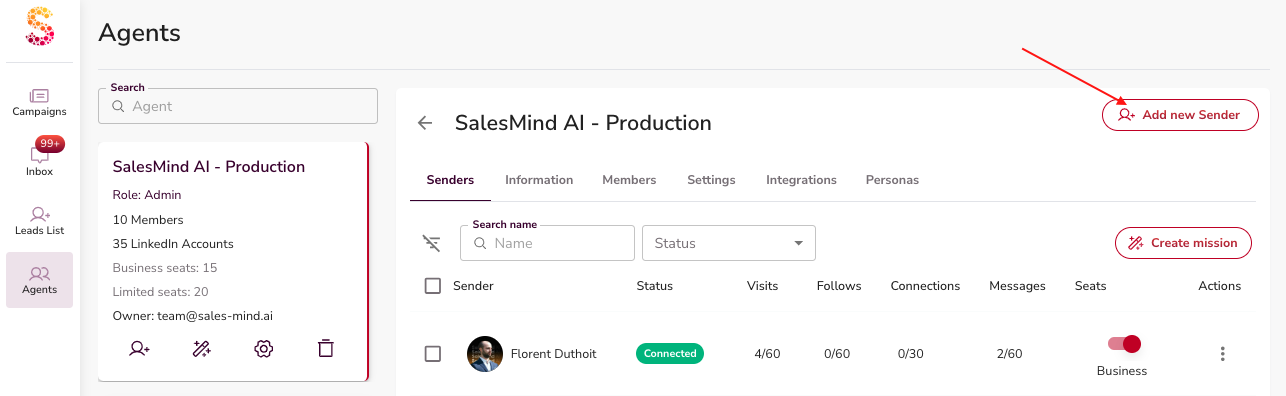
Check that your sender appears in your agent. It should connect on its own.
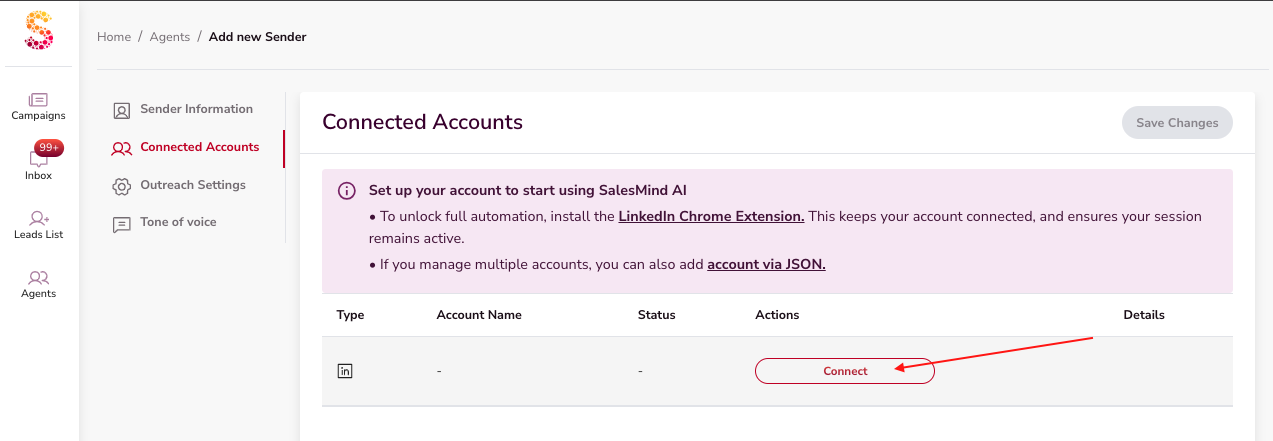
👉 Note: Need help with the extension? See How to Install the Chrome Extension in Related Articles below.
4. Build Your Personas
Personas define who you want to target. Good personas help campaigns reach the right people.
When you fill in your agent info — company link, services, and description — SalesMind AI creates personas for you on its own.
⚠️ Warning: Always check the auto-created personas before you launch any campaign. Make sure they match the audience you want to reach. Edit anything that looks off, then press Save Changes.

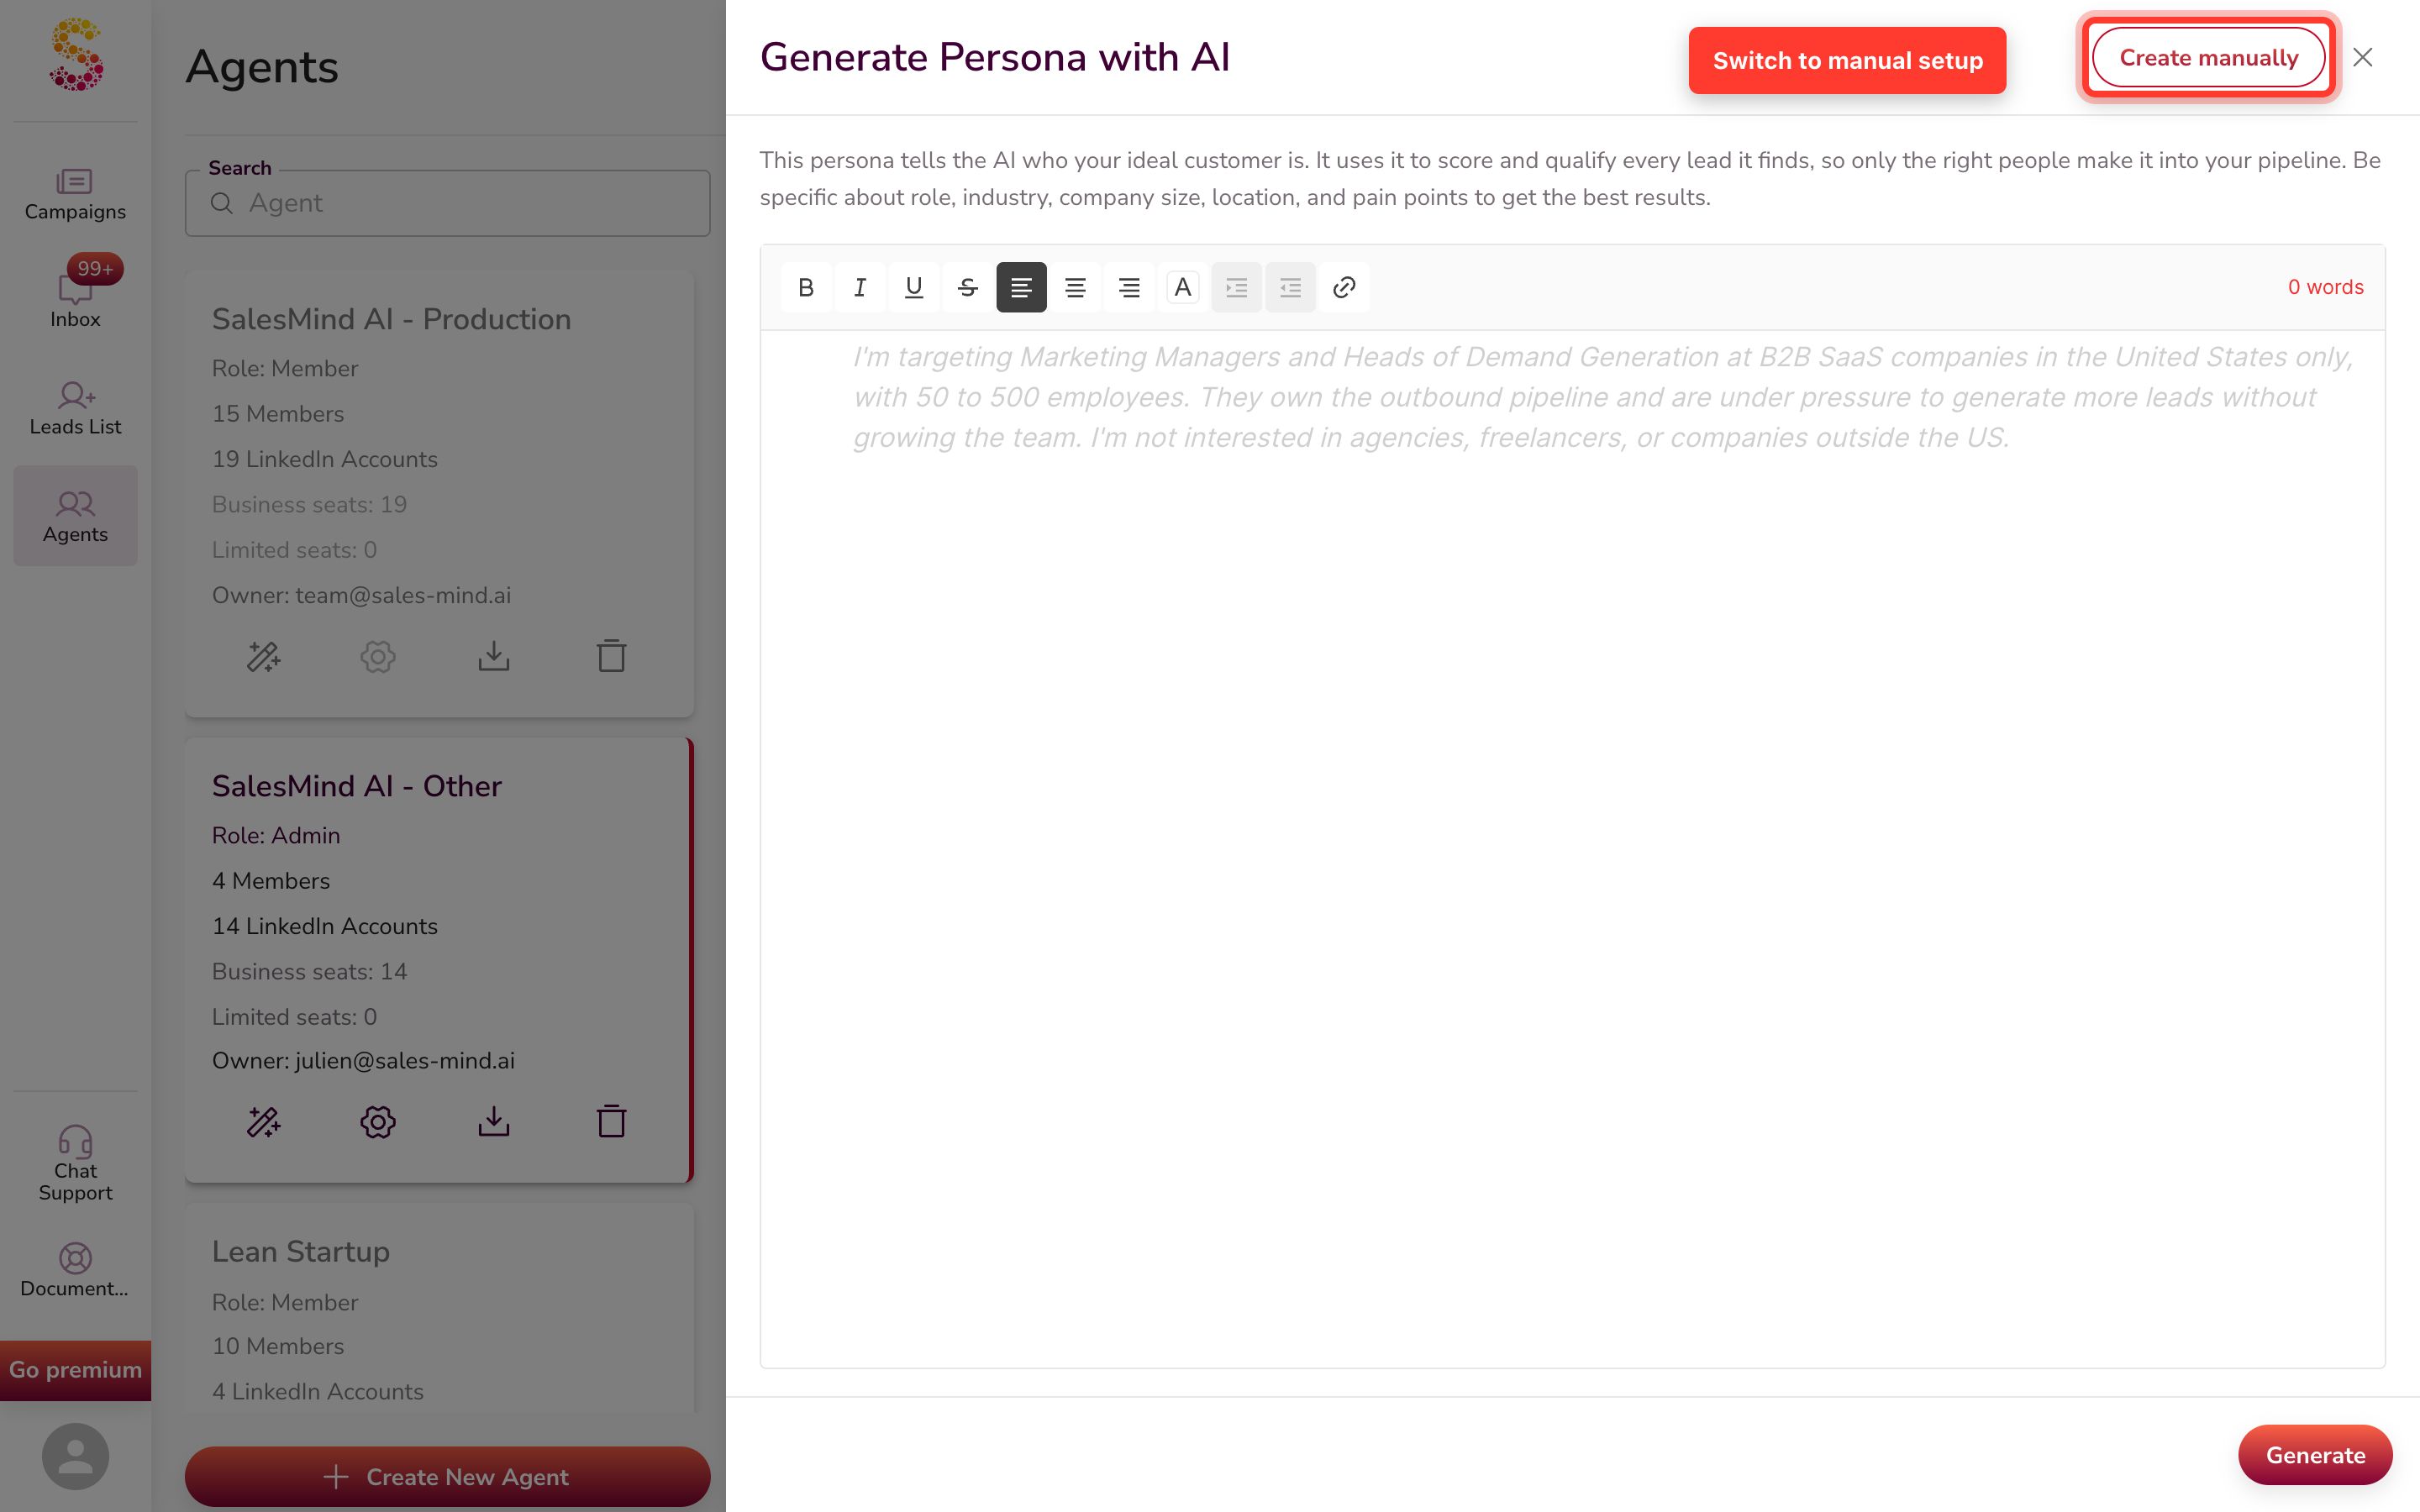
You can also create new personas yourself. Click Create Persona and pick one of two options:
Option 1: Generate with AI (Recommended)
Type a short description of your ideal customer. You can also paste text from an existing ICP document.
Include details like:
- Who you want to target
- Company size
- Job title
- Industry
- Location
- (Optional) Who you do not want to target
The AI builds the persona for you.
⚠️ Warning: Always review the result and edit what you need. Then press Save Changes.
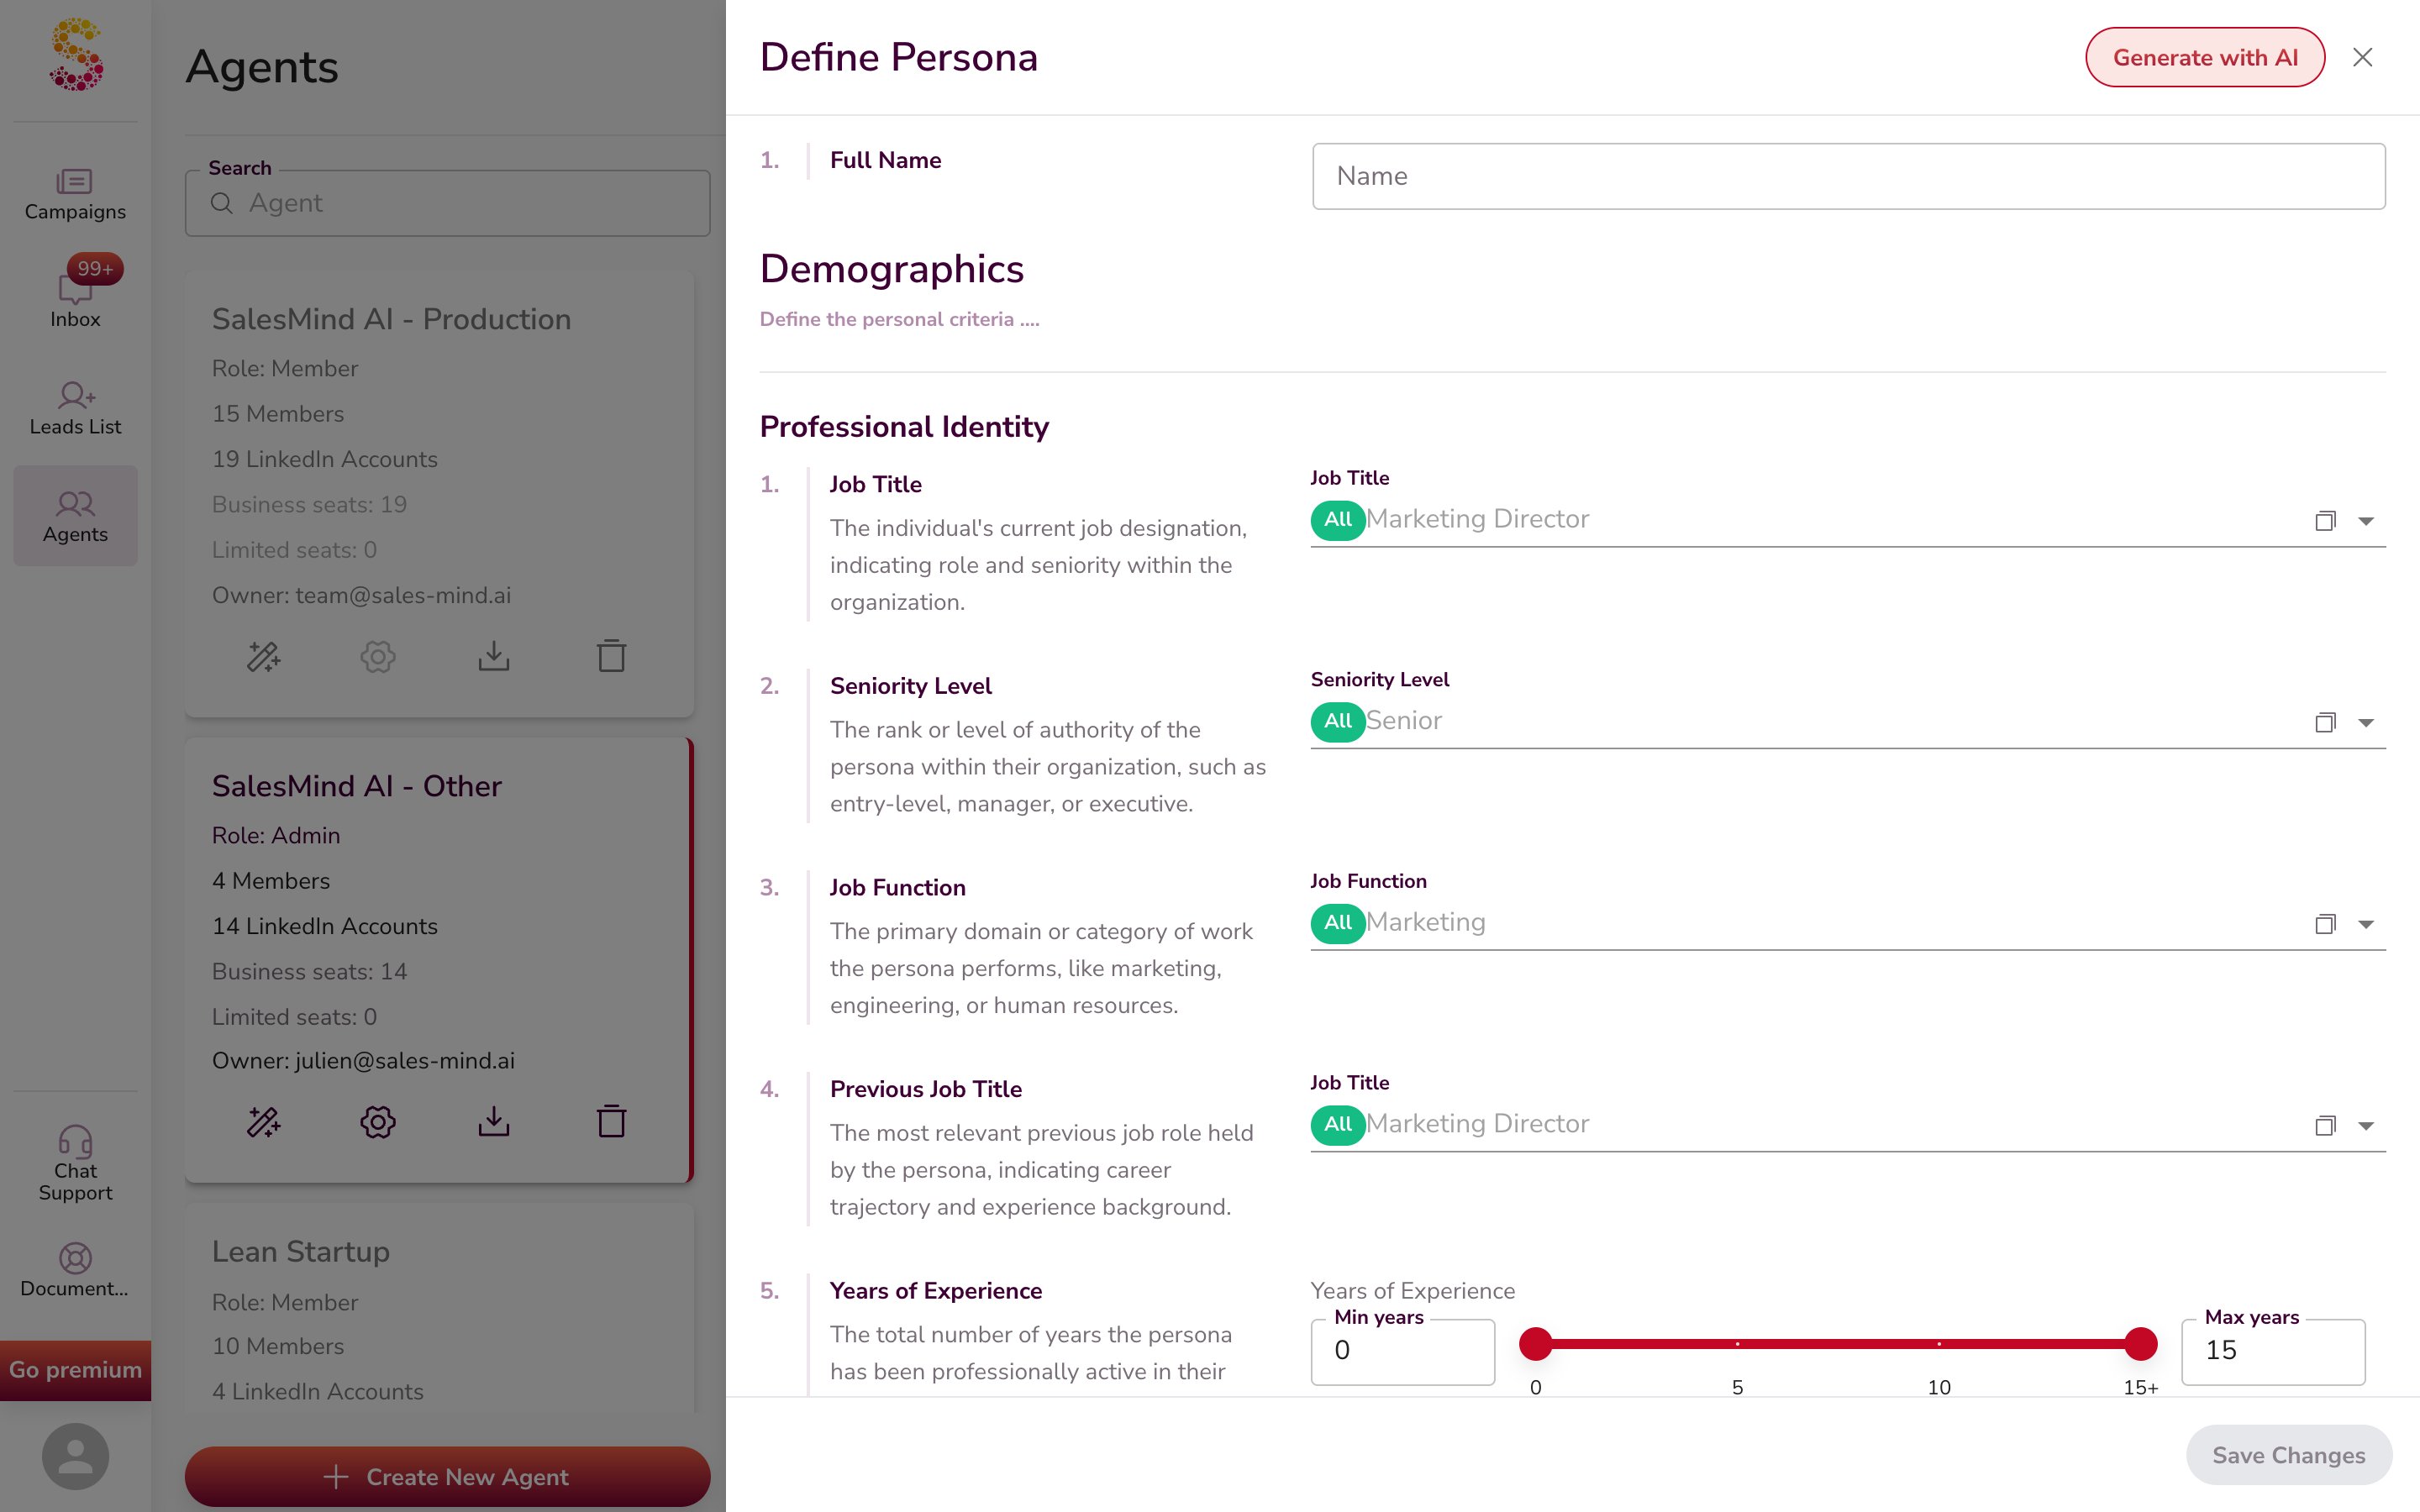
Option 2: Create Manually
You can also build a persona by hand. Fill in each field one by one — Full Name, Demographics, Job Title, Seniority Level, Job Function, and more.
How Many Personas Do You Need?
Aim for at least 3 detailed personas. The more detail you add, the better your campaigns will perform.
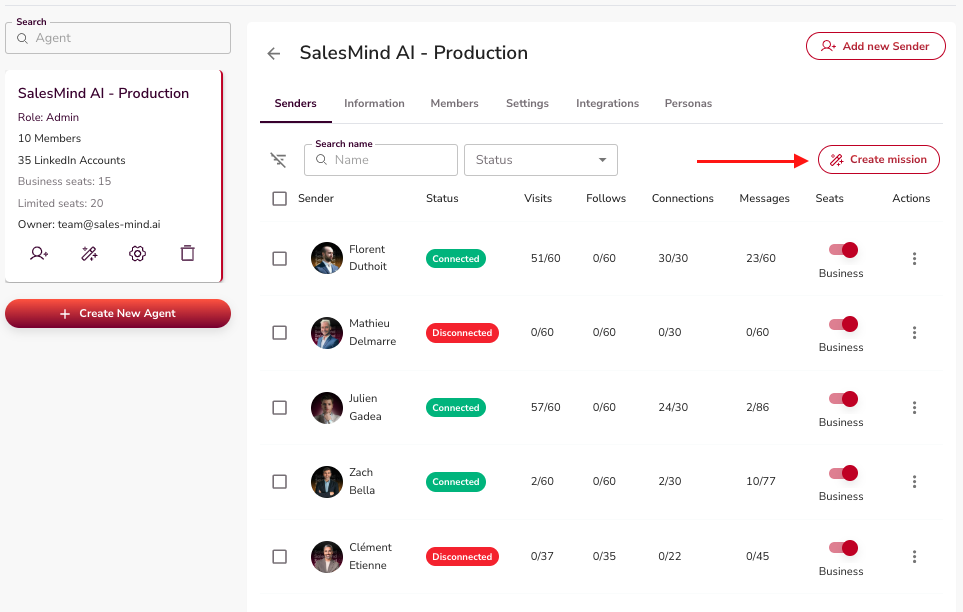
5. Launch Missions & Campaigns
Once your personas are ready, you can start outreach. You have two paths:
- Create a Mission (recommended) — A mission combines your senders, personas, and services. It generates multiple campaigns in a few minutes.
- Create a Campaign by hand — This works too, but takes more time. You go through each step one by one.
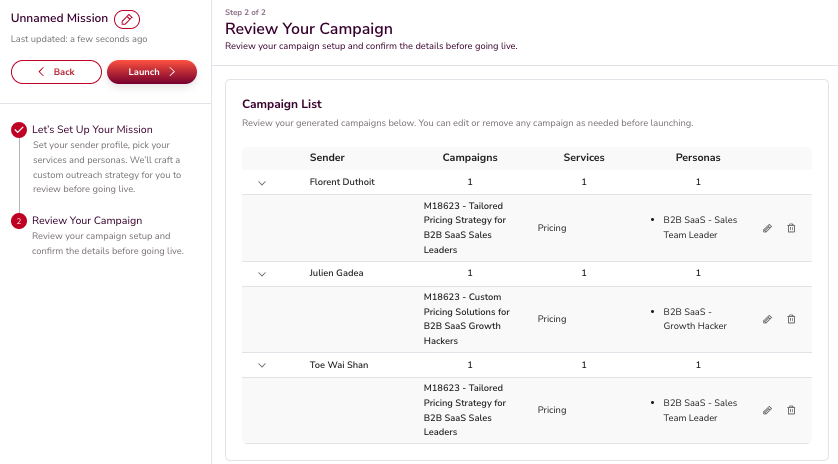
Review and update the AI-made campaigns. Click Launch when ready. The AI splits leads across senders, personas, and services. Startup may take a few minutes.
👉 Note: See What is a Mission and How to Create One and Campaign Creation: Step-By-Step Guide in Related Articles below.
6. Track Your Campaign Metrics
Your dashboard shows key numbers once campaigns are live. These help you see what is working.
Acceptance Rate
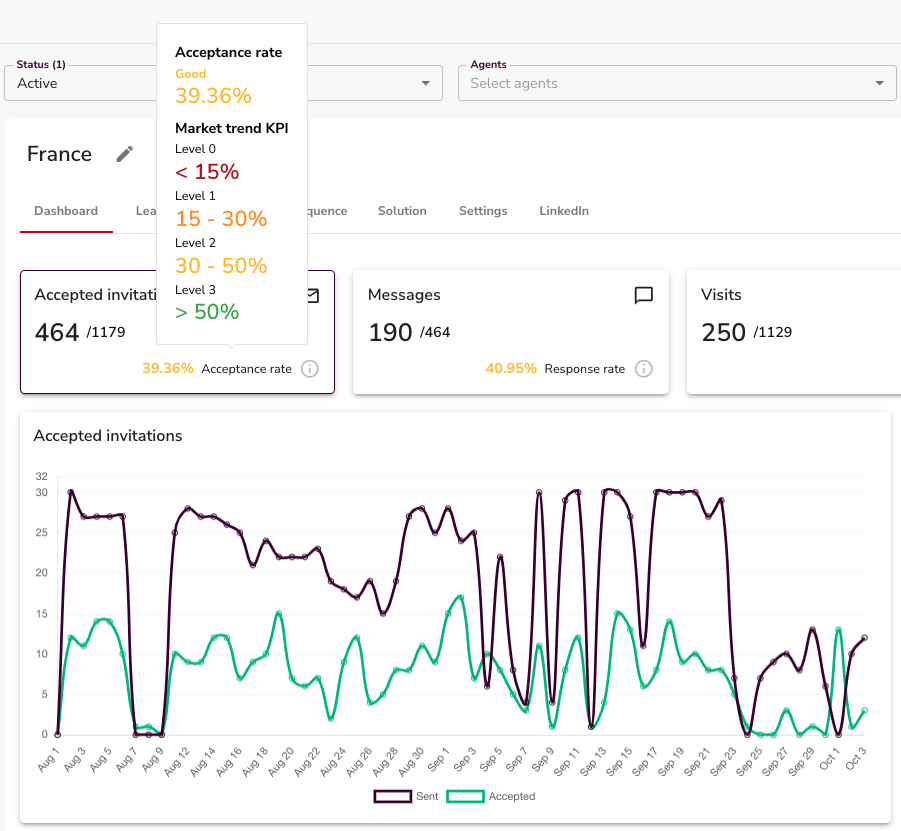
Shows how many leads accepted your connection request.
Messages
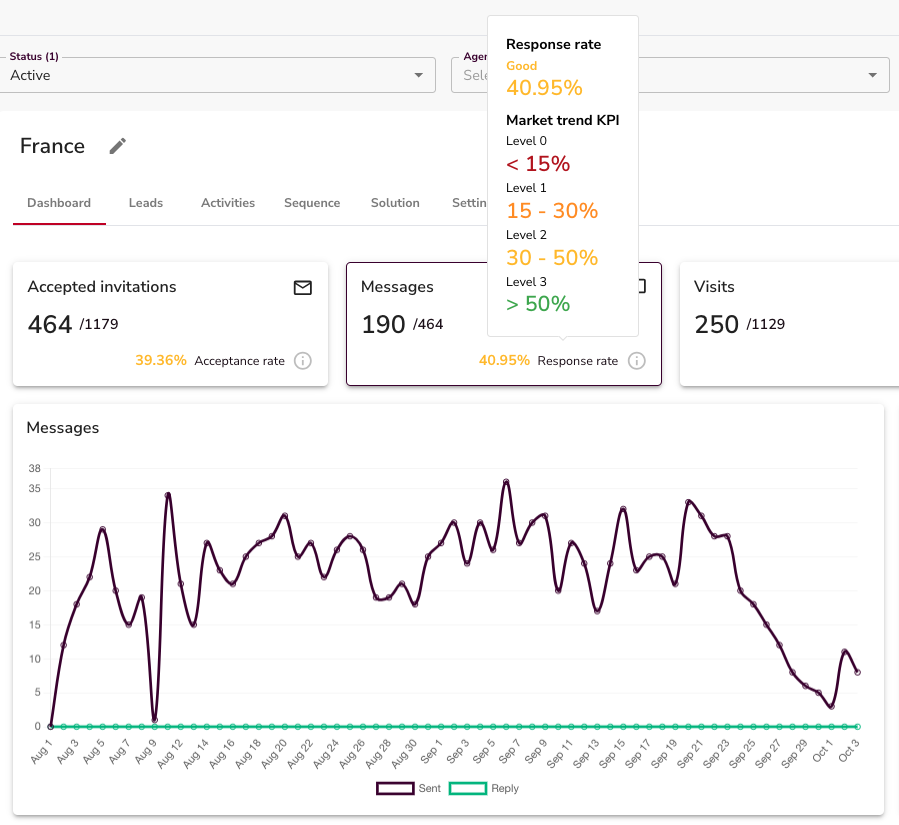
Shows the total number of replies you received.
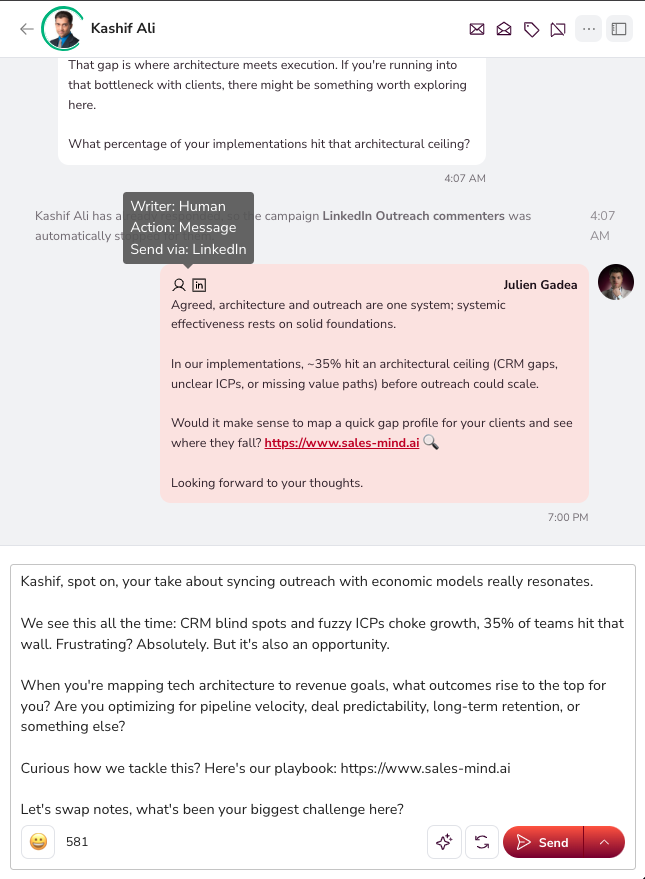
7. Manage Your Inbox

The Inbox is where you manage all conversations. Open it to see your ongoing chats.
You can narrow your view with these filters:
- Senders — if your agent has more than one sender, pick a name to see only their conversations.
- Search — type a lead's name to find their chat.
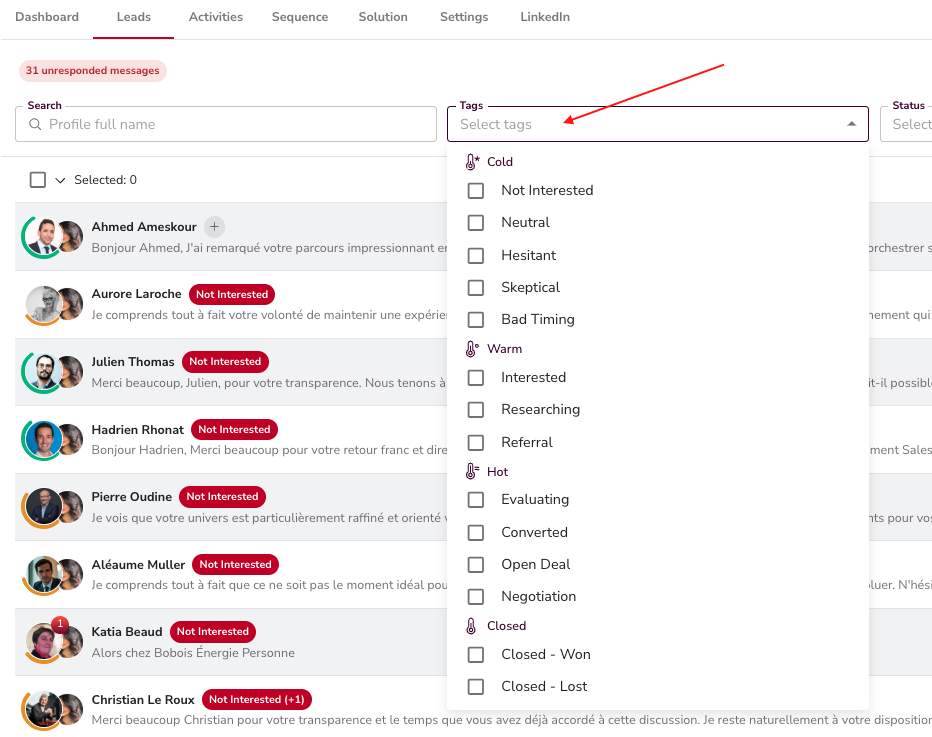
- Tags — tags are added on their own based on the conversation. To change or add a tag, click the tag next to a lead's name.
- Agents — if your account has more than one agent, pick the one you want.
- Status — filter by conversation status to focus on a specific stage.
Open any chat to see the full message history. Messages sent by AI or you are clearly marked.
Keep Your Inbox at Zero
⚠️ Warning: Your inbox should always have zero messages with the "Your Turn to Reply" status. When hot, interested leads start coming in, they will get lost in a flood of unreplied messages. Reply fast or you lose the deal.
There are two ways to clear the "Your Turn to Reply" status from a lead:
1. Reply to them. Send a message and the tag goes away once you refresh the page.
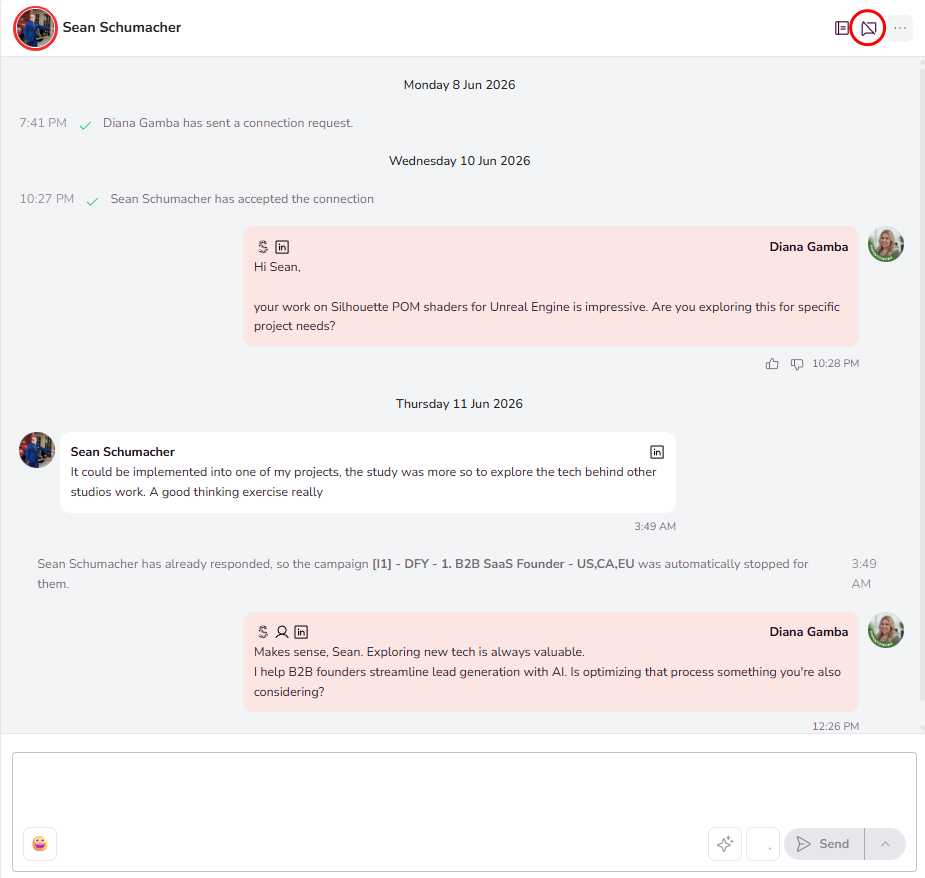
2. Terminate the conversation. This is useful when you do not want to talk to a lead anymore, the chat is going nowhere, or the conversation is finished. Terminating only removes the "Your Turn to Reply" tag — it does not delete any data about the lead.
To terminate a single lead, click the crossed message icon in the top right of the conversation (to the left of the three dots).
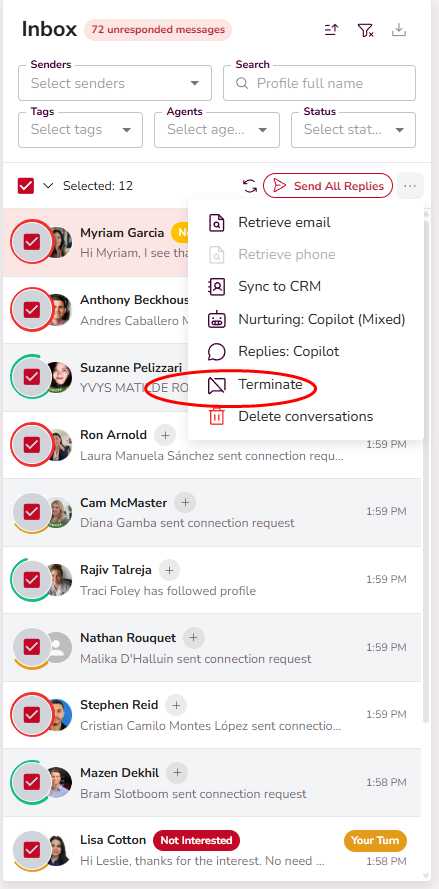
To terminate multiple leads at once, set your filters, select the leads, click the three dots on the right, and then click Terminate.
Statuses
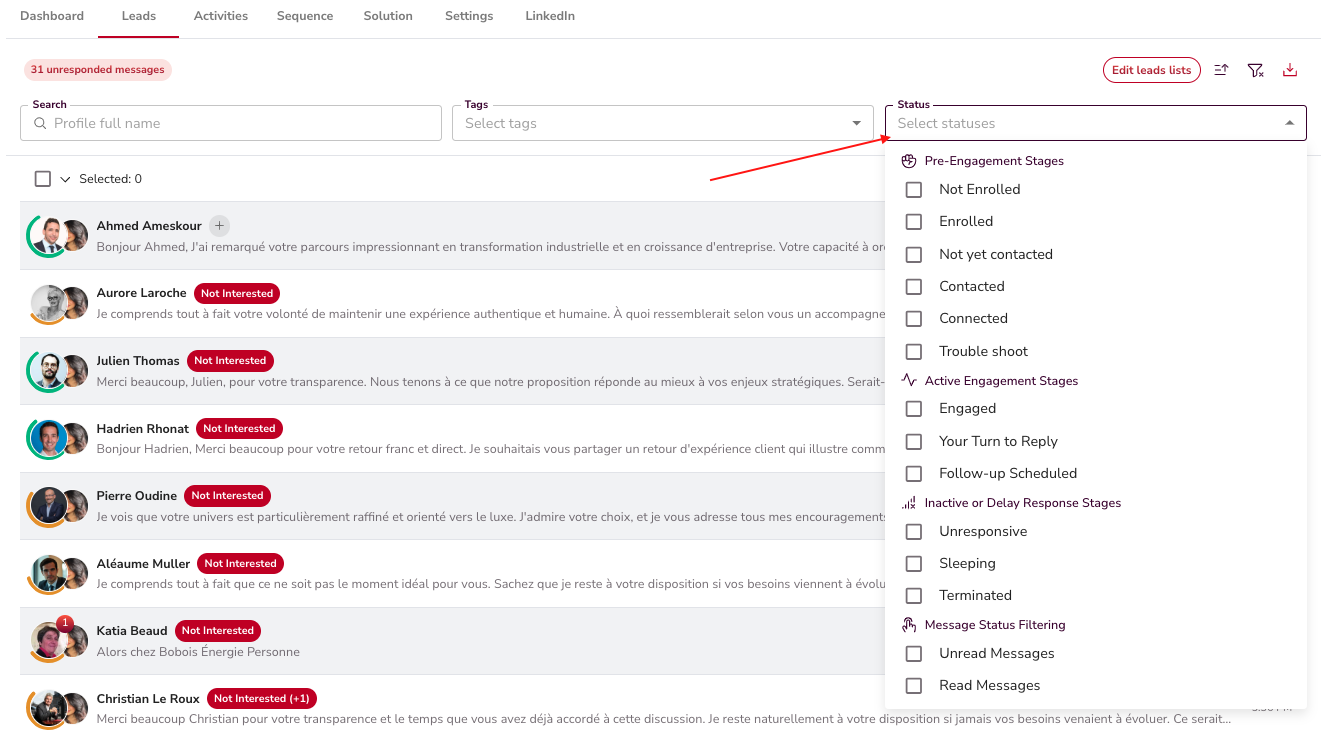
Each chat has a status that updates on its own. You will see labels like Connected, Engaged, Follow-Up Scheduled, Unresponsive, Sleeping, and Terminated. This tells you where every lead sits in the funnel.
Qualification
The AI tags leads as "Interested" on its own when they show buying signals.
Side Panel & Lead Scoring
The right-hand panel shows the full lead profile — demographics, work history, company details, and persona fit.
Every lead gets a Lead Score from 0 to 100. This score shows how closely they match your persona. Higher-scored leads are contacted first. The score appears on the lead avatar and in the Lead Scoring chip.

💡 Tip: Use the lead score to decide which chats to handle first. A high score means the lead closely matches your ideal customer.
8. Give AI Feedback
SalesMind AI learns from your input. You will see thumbs up / thumbs down icons on AI outputs across the Inbox. Use them to tell the AI what works and what does not.

You can leave feedback on five types of AI output:
- AI messages — sequence messages, autopilot replies, and nurturing
- Reply suggestions — drafts the AI proposes before you send
- Lead status — whether the AI tagged the status correctly
- Lead scoring — whether the score matches the actual fit
- MBTI personality — whether the personality read feels right
Click a thumb to open a drawer. Toggle Accurate / Inaccurate and add a comment if you want. The more feedback you give, the faster the AI improves.
💡 Tip: Flag both good and bad outputs. The AI learns best from a balanced mix.
To see all feedback from your team, go to Agents → pick your agent → AI Feedback tab.

9. Your Daily Routine
- Check your inbox every day.
- Respond to leads tagged "Your Turn to Reply". Keep that number at zero.
- Leave thumbs up / down feedback on AI messages as you work.
- Everything else — outreach, targeting, and autopilot replies — runs on its own.
Your campaigns are live. Handle the flagged chats and watch the leads come in. 🎯
Key Takeaways
- Create your account and set up an Agent.
- Fill in your LinkedIn company, Tailored Sales Playbook, Brand Tone of Voice, services, and resources.
- Outreach rules apply to all senders under the agent.
- Personas are created on their own from your agent info — always check them before launching.
- Build at least 3 detailed personas.
- Use Missions to generate campaigns fast.
- Review campaigns before you launch them.
- Use the Inbox to manage replies. Keep "Your Turn to Reply" at zero at all times.
- Check the side panel for lead scores and persona fit.
- Leave AI feedback often — it trains the AI to work better for you.
What's Next?
Check out the First 7 Days Roadmap in Related Articles below.
Happy Prospecting! 🚀