1. Account Setup
Create Your Account
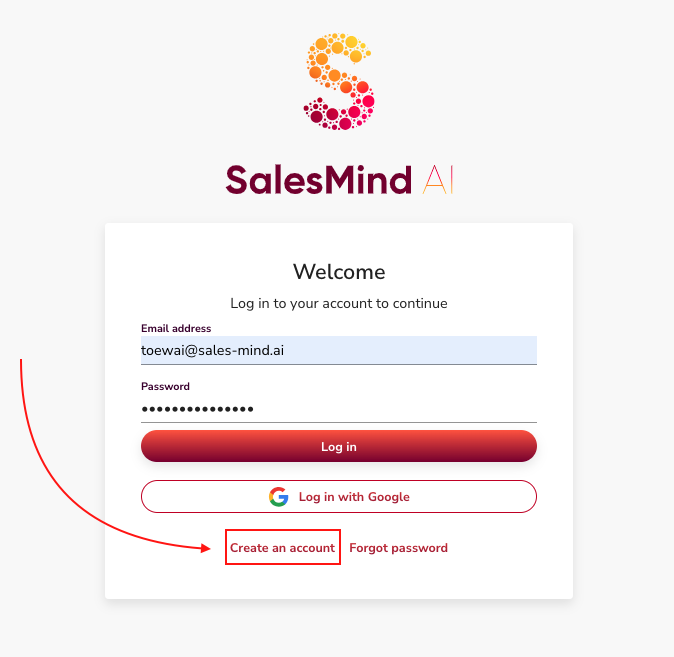
- Go to the SalesMind AI registration page and create your account.
- Once your account is created, you can start setting up your agents.
2. Agents
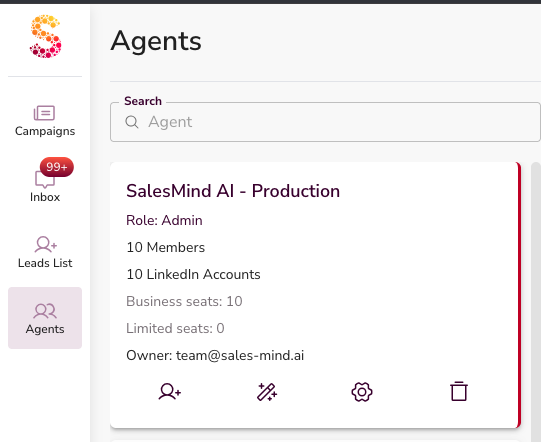
An Agent is your main workspace in SalesMind AI.
Everything lives inside an agent:
- LinkedIn senders
- Personas
- Missions
- Campaigns
👉 Create one agent per company, brand, or client.
2.1 Agent Information
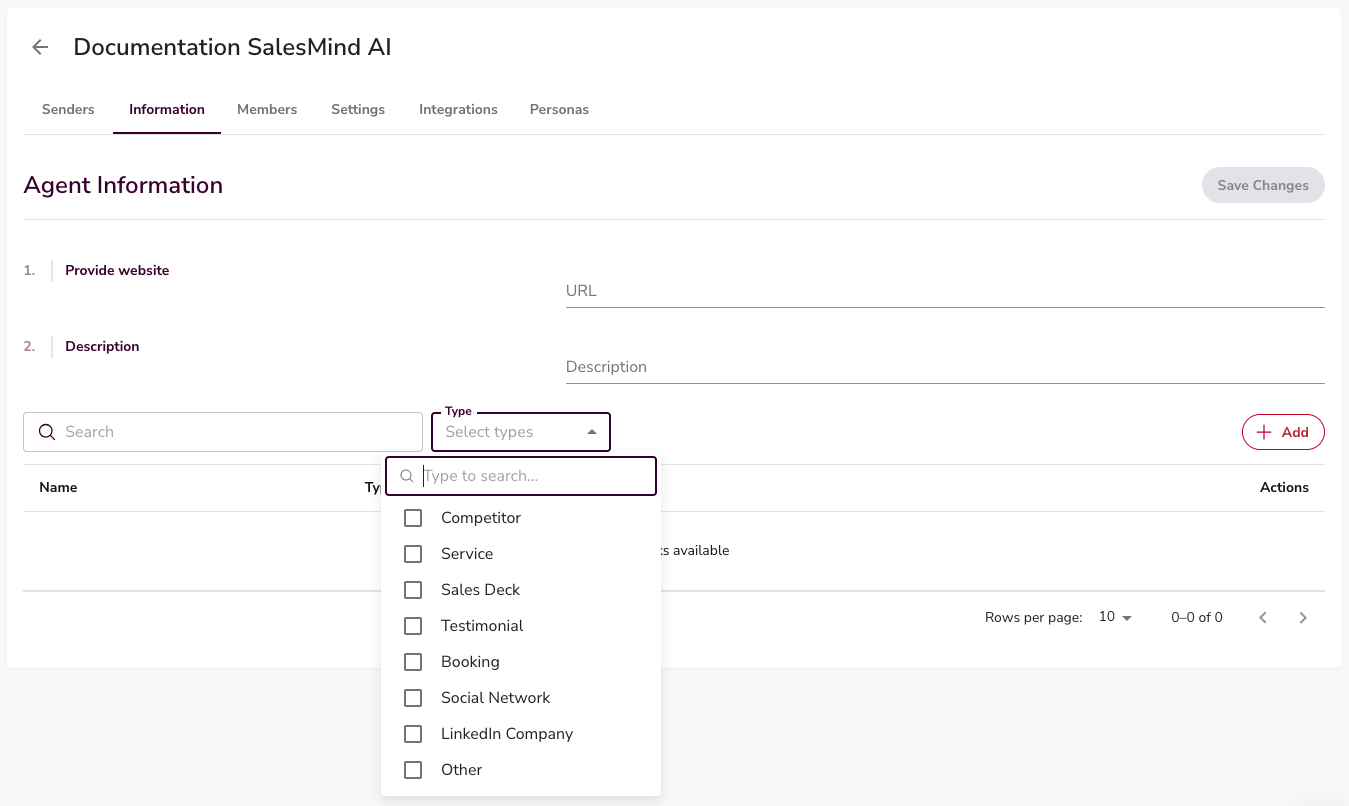
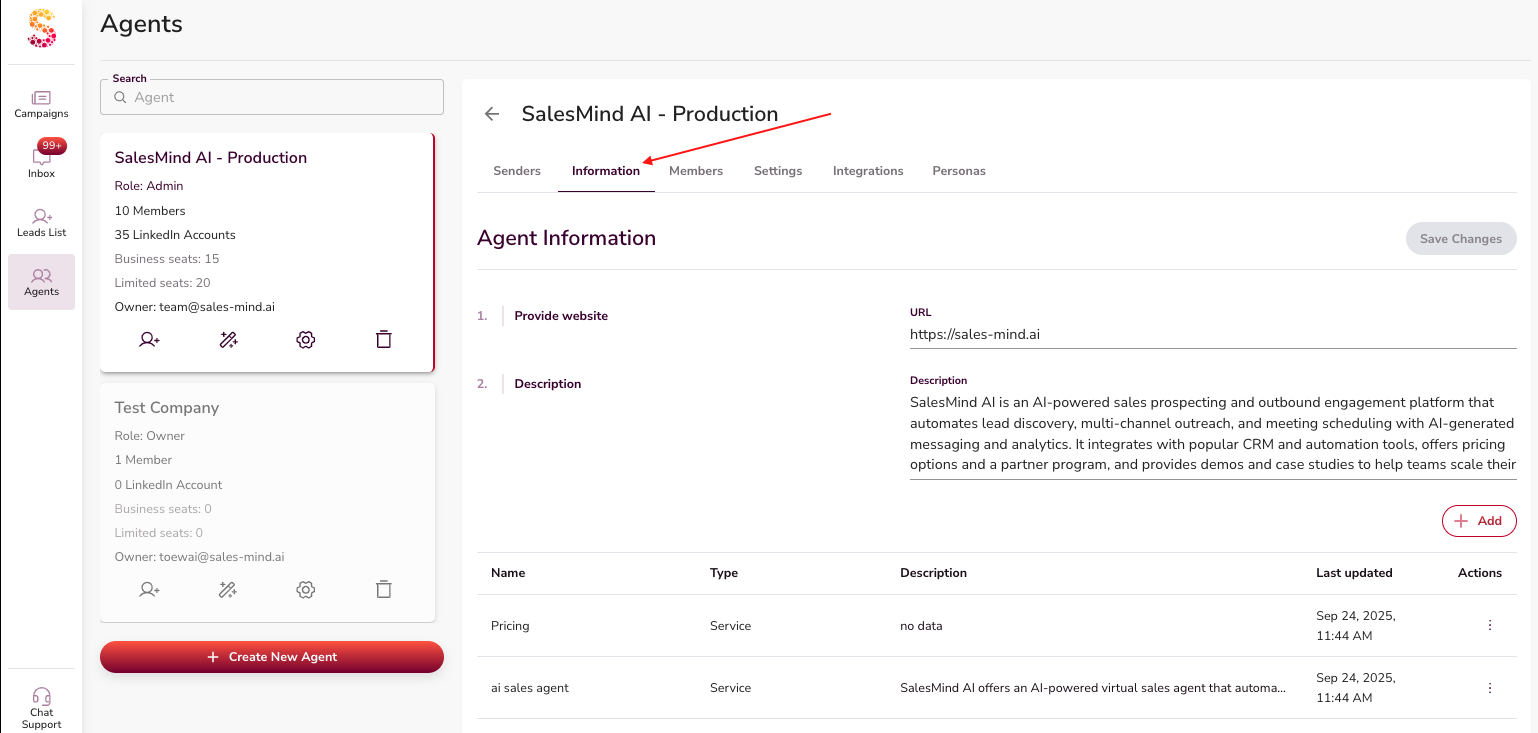
Open your agent and go to the Information tab.
Here, you can add as much content as you wish — the more, the better. The more context you give, the more accurately the AI will represent your business.
At a minimum, make sure the following are filled in:
- LinkedIn company page
- Tailored Sales Playbook
- Brand Tone of Voice
- At least 2 services
💡 Your Tone of Voice and Tailored Sales Playbook are created automatically once you insert your company website.
Anything else you can share — testimonials, free trials, lead magnets, case studies, videos — should be added under Resources.
👉 To add any link in the agent, go to the Information tab, then click the + Add button.
2.2 Outreach Settings
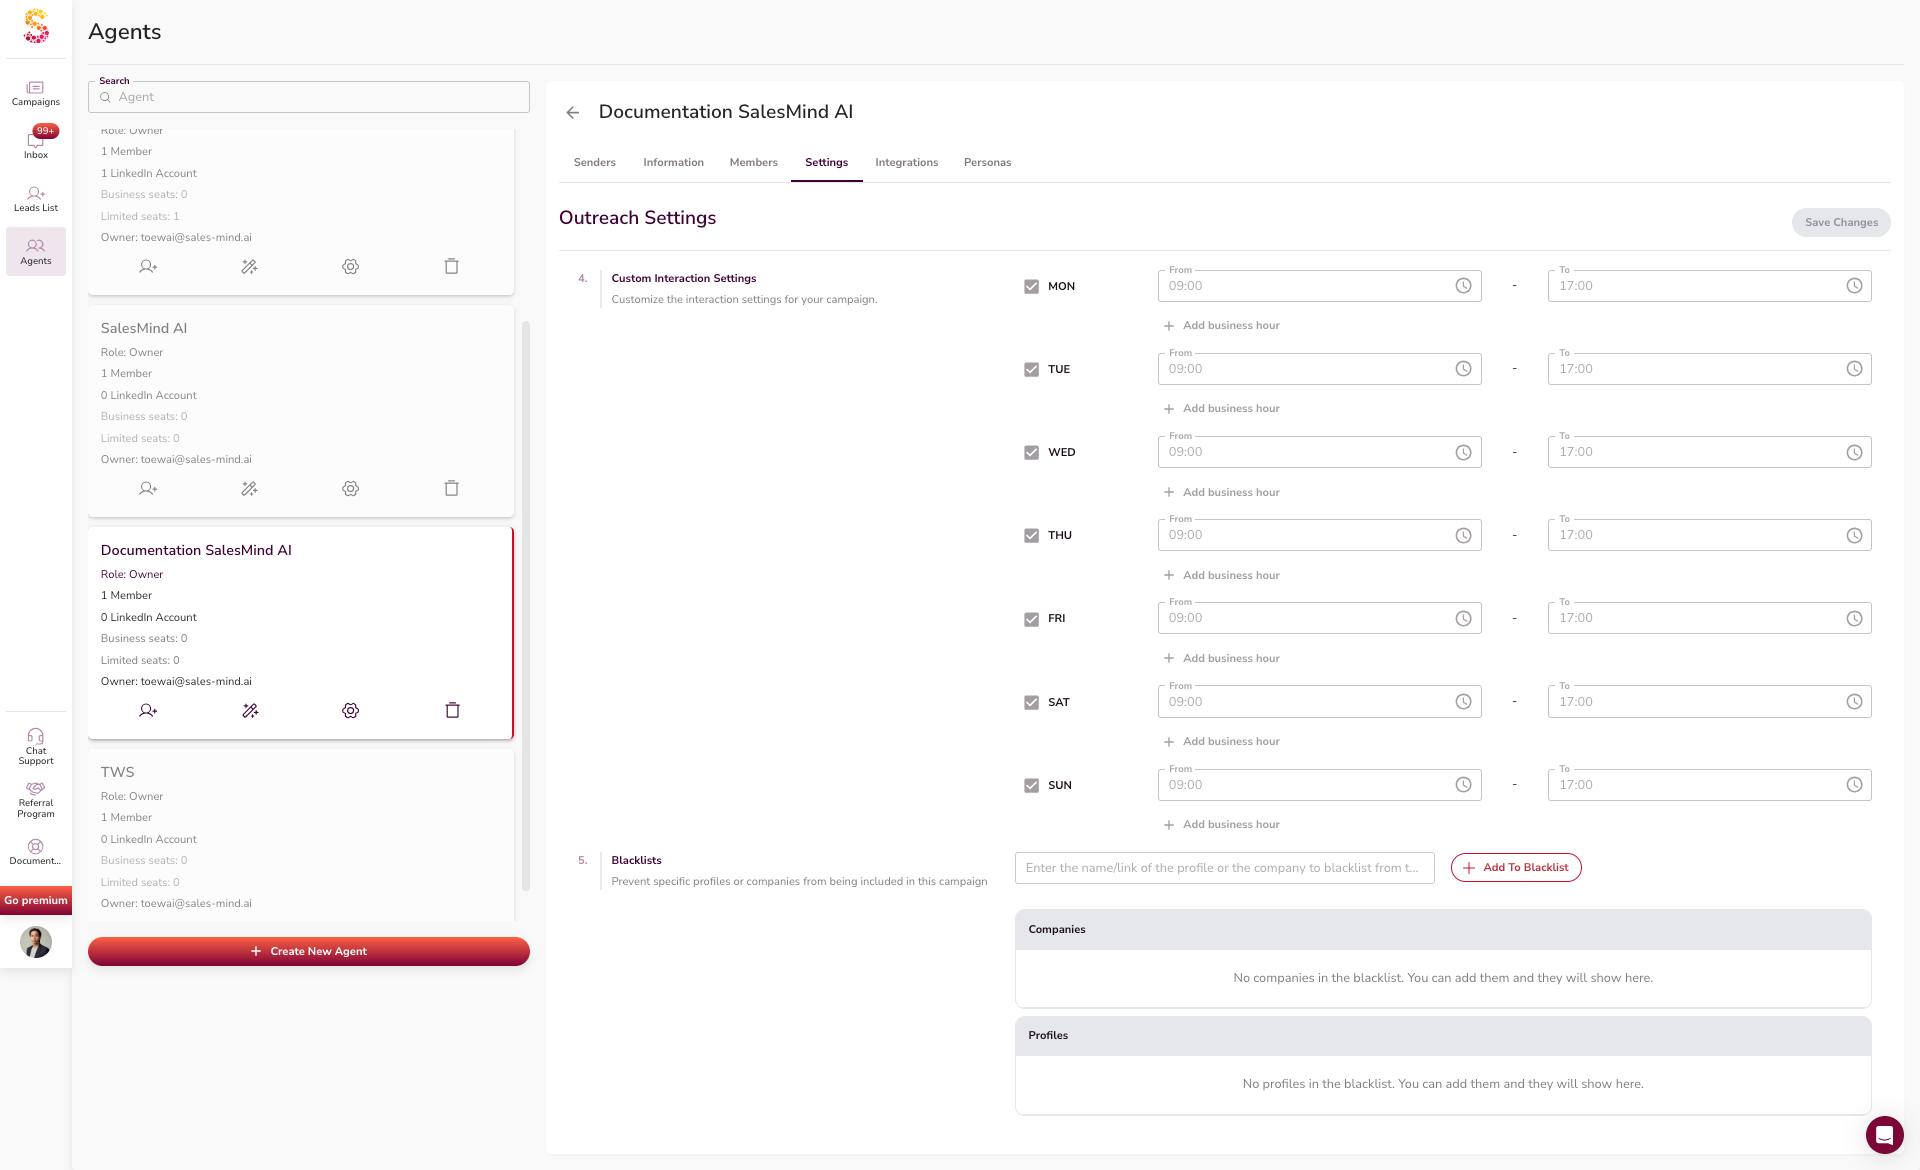
Go to the Settings tab inside the agent.
Set:
- Inactive days and holidays
- Business hours or time zone
- Interaction times — we recommend turning on "Auto detect prospect's business hours" so the AI only interacts during those hours. It feels more natural and doesn't get flagged by LinkedIn.
- Blacklists to prevent specific profiles or companies from being included in this campaign
👉 These apply to all senders under this agent.
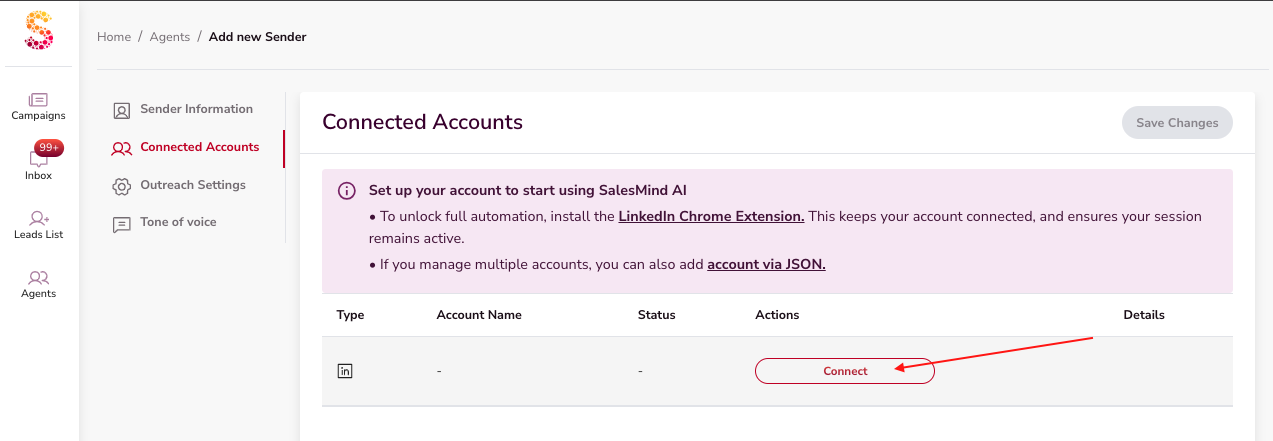
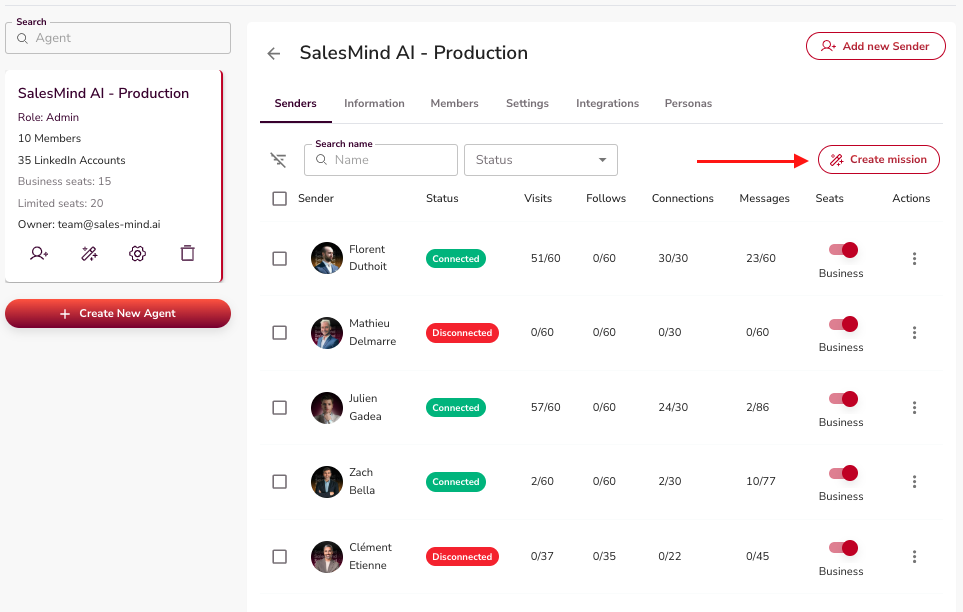
3. Add LinkedIn Senders
- Go to the Senders tab.
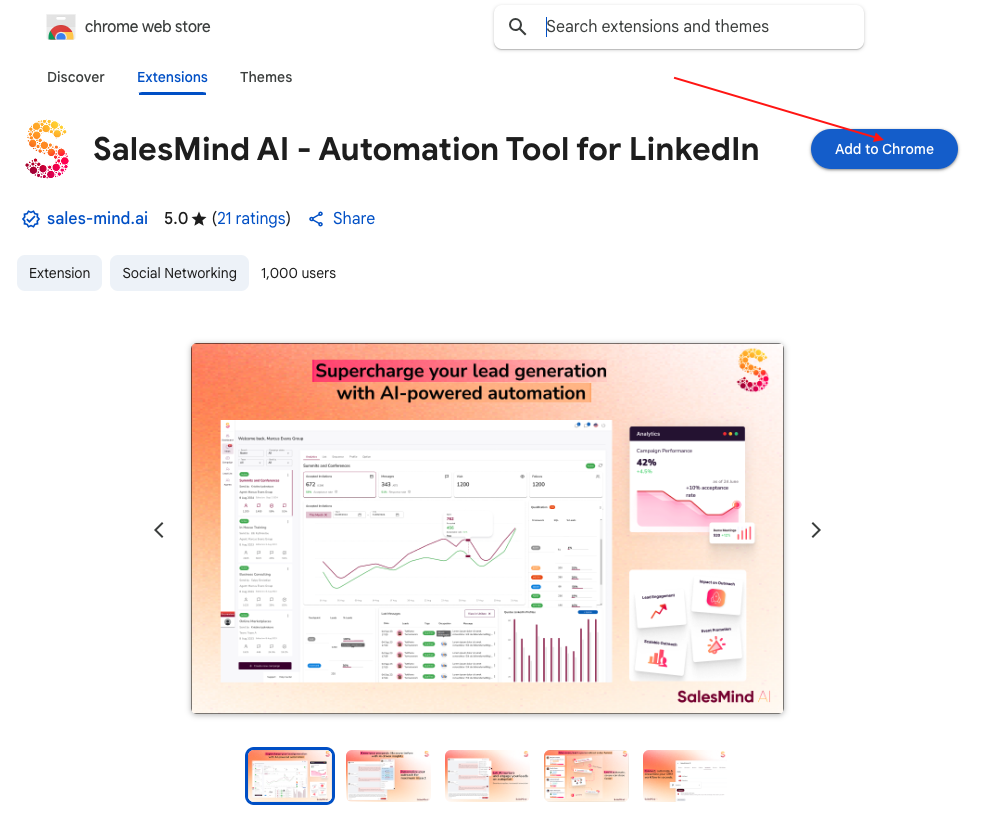
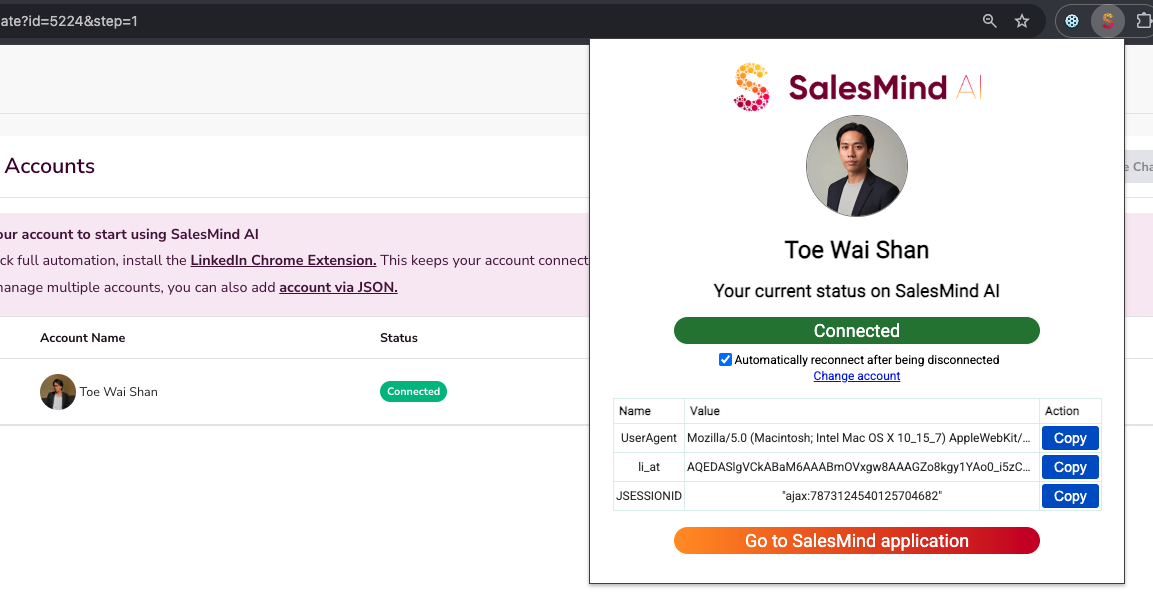
- Install the SalesMind AI Google Chrome Extension to connect your LinkedIn account.
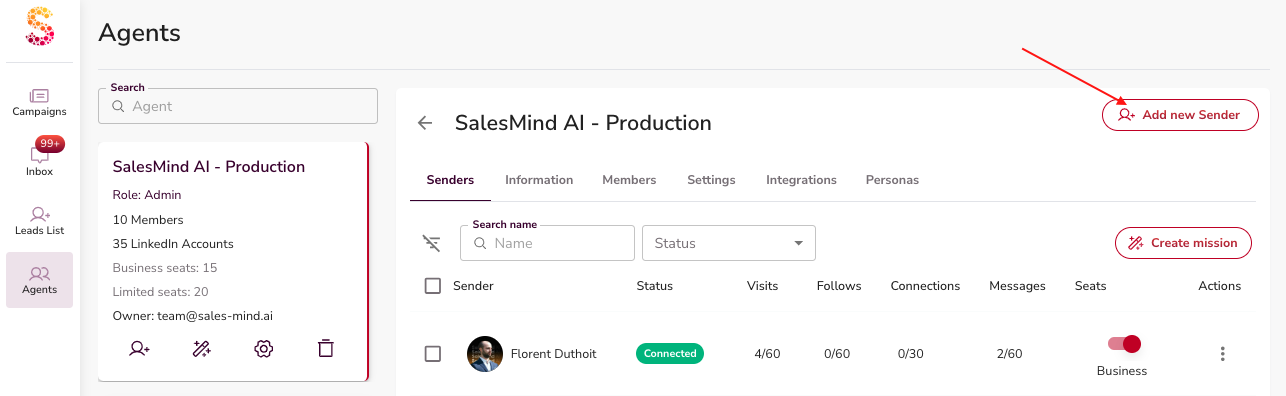
- Verify that your sender is in your agent (it should be automatically plugged in).
4. Personas
Personas describe who you want to target. Correct personas help campaigns target the right audience efficiently.
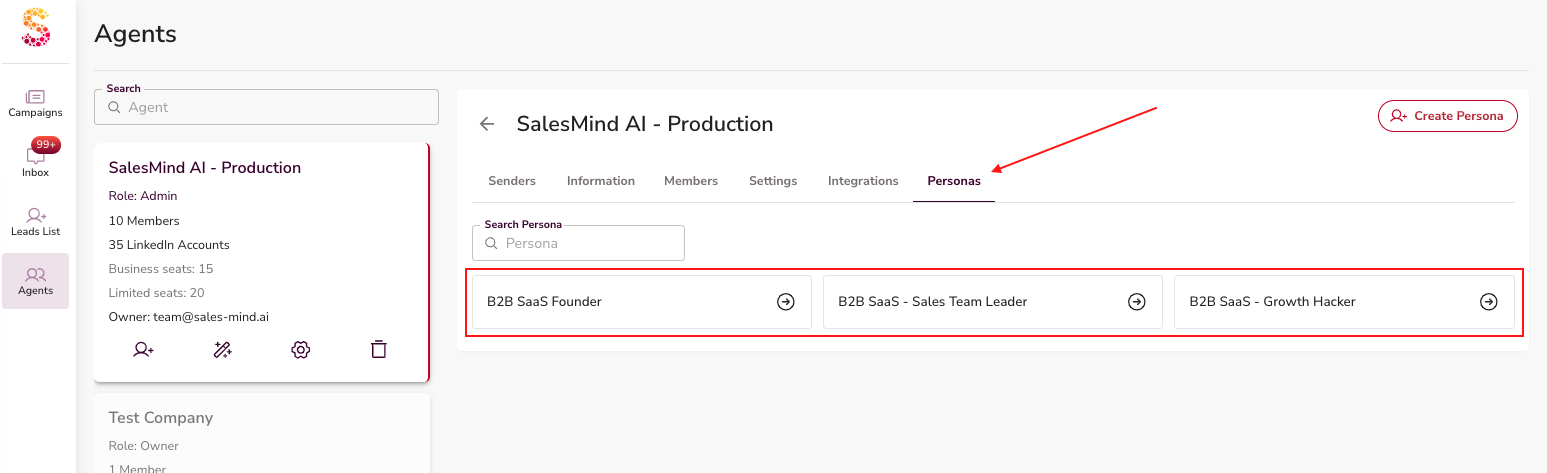
When you click Create Persona, you have two options:
Option 1: Generate Persona with AI (Recommended)
Simply type a description of your Ideal Customer Profile (ICP) — or, if you already have a document about it, paste the text straight in.
Briefly describe:
- Who you want to target
- Company size
- Job title
- Industry
- Location
- (Optional) Who you do not want to target
The AI will then automatically generate a persona for you.
⚠️ Once generated, always review the result and make any changes you need. Then press Save Changes.
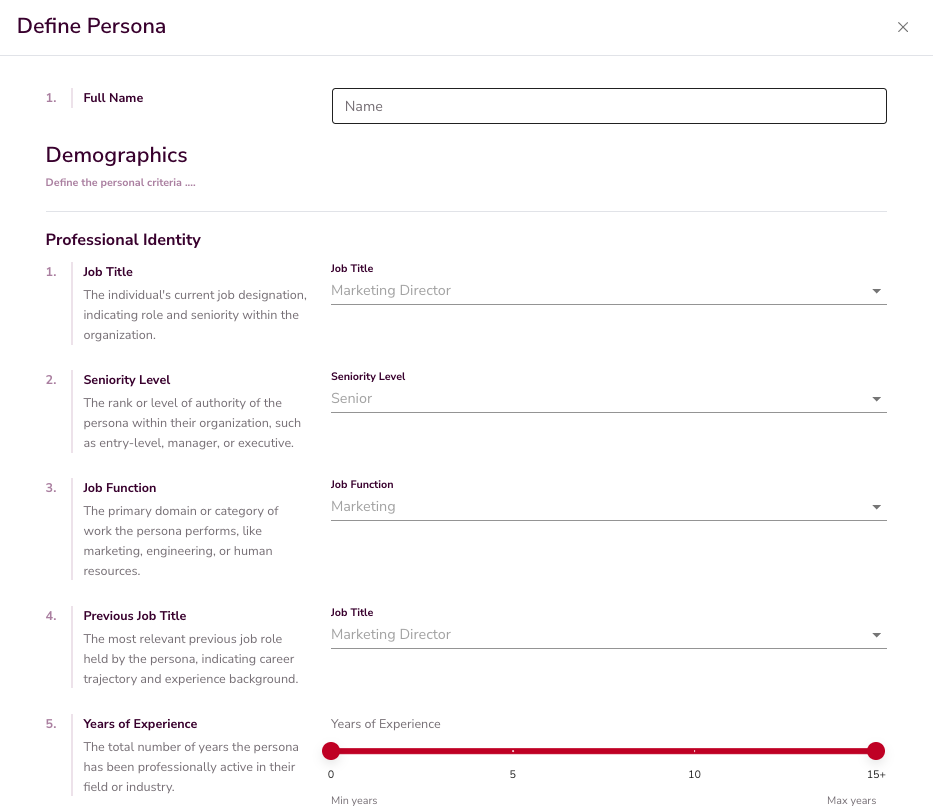
Option 2: Create Manually
If you'd rather define the persona yourself, you can create it manually. This takes more time, as you'll go through every field one by one — Full Name, Demographics, Job Title, Seniority Level, Job Function, and so on.
How Many Personas Do You Need?
A good rule of thumb: aim for at least 3 detailed personas. The more detailed your personas are, the better results your campaigns will get.
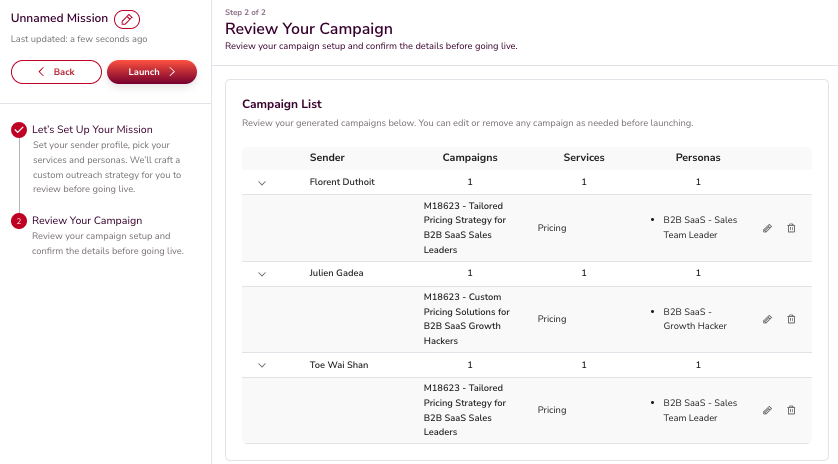
5. Missions & Campaigns
Once your personas are ready, it's time to launch outreach. You can either:
- Create a Mission — recommended. A mission is a strategy container that combines your senders, personas, and services to generate multiple campaigns automatically in just a few minutes.
- Create a Campaign manually — possible, but it takes a significant amount of time, as you'll need to go through each campaign step by step.
Learn more:
6. Track Your Campaign Metrics
Once your campaigns are live, your dashboard shows the key performance metrics. Knowing what these mean helps you understand what's working and what to adjust.
Acceptance Rate
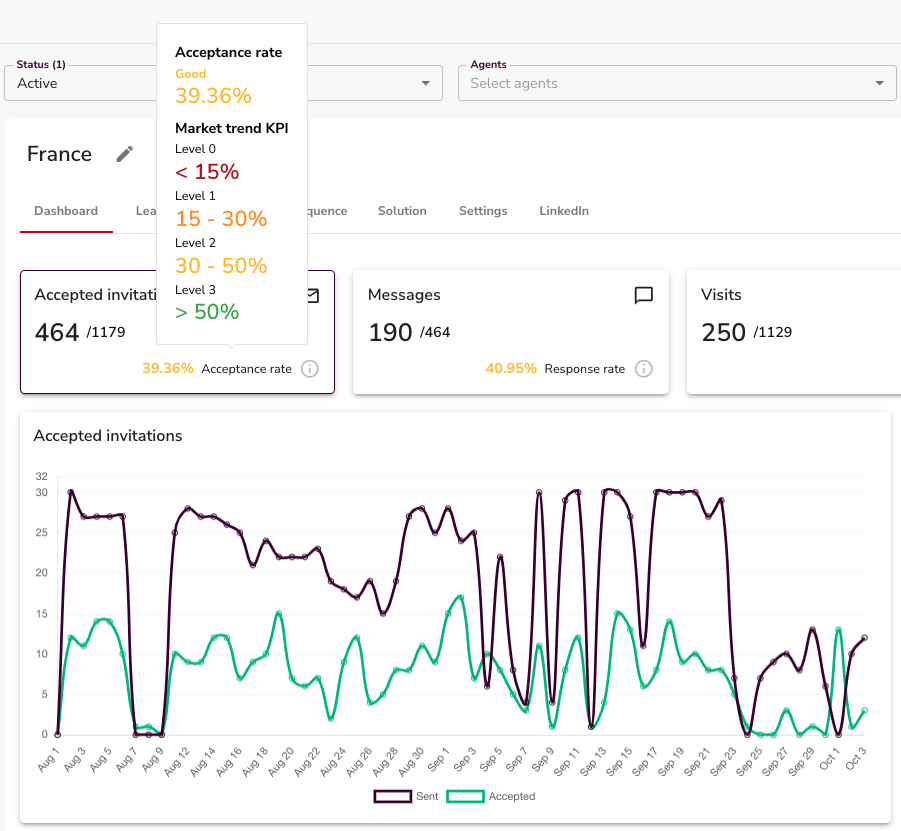
How many prospects accepted your connection request.
Messages
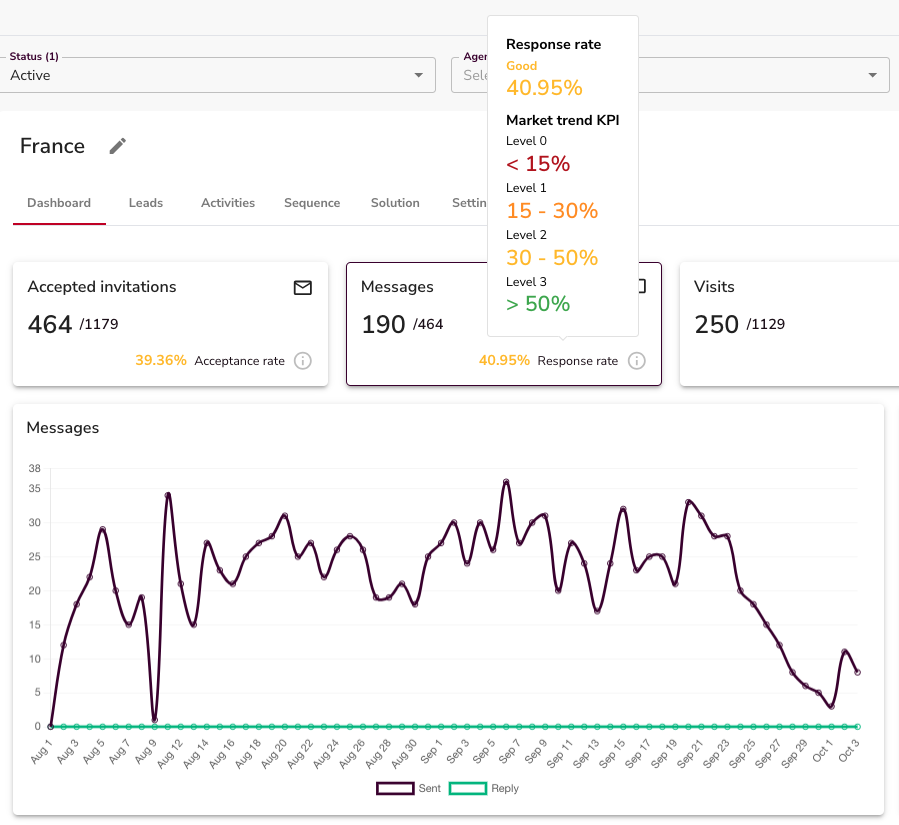
Total responses received.
7. Manage Your Inbox
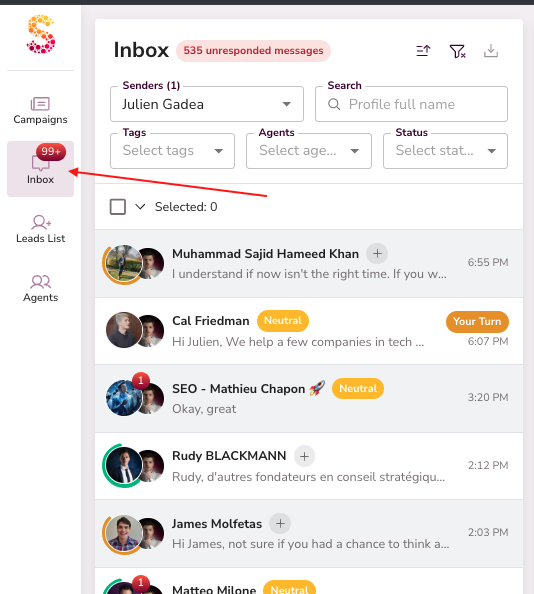
The Inbox is where you manage every conversation. Go to the Inbox to review ongoing conversations.
- You can filter the chats by Tags or Status.


- Open any conversation to see the full history.
- Messages written and sent by AI or yourself are clearly marked.
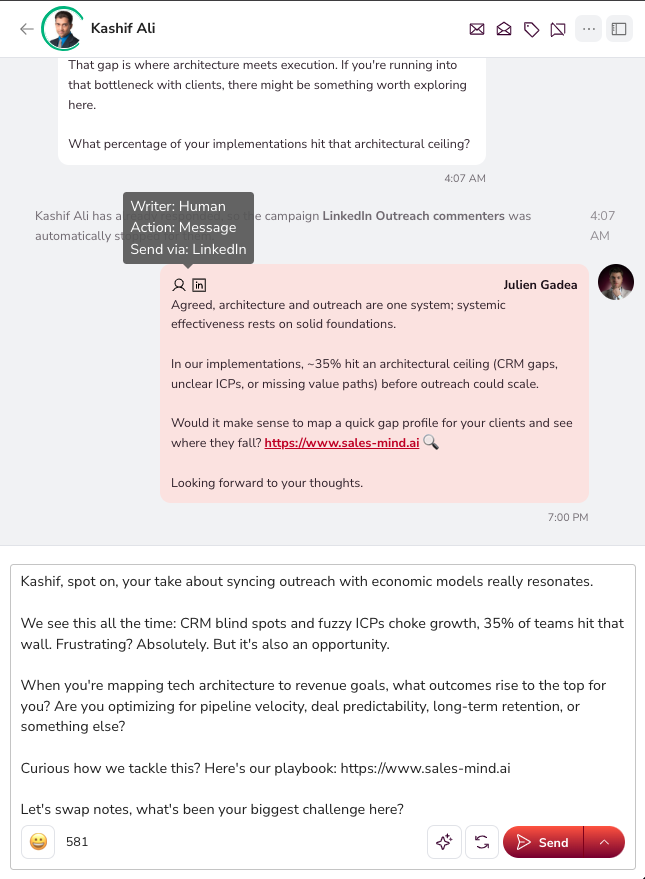
Statuses
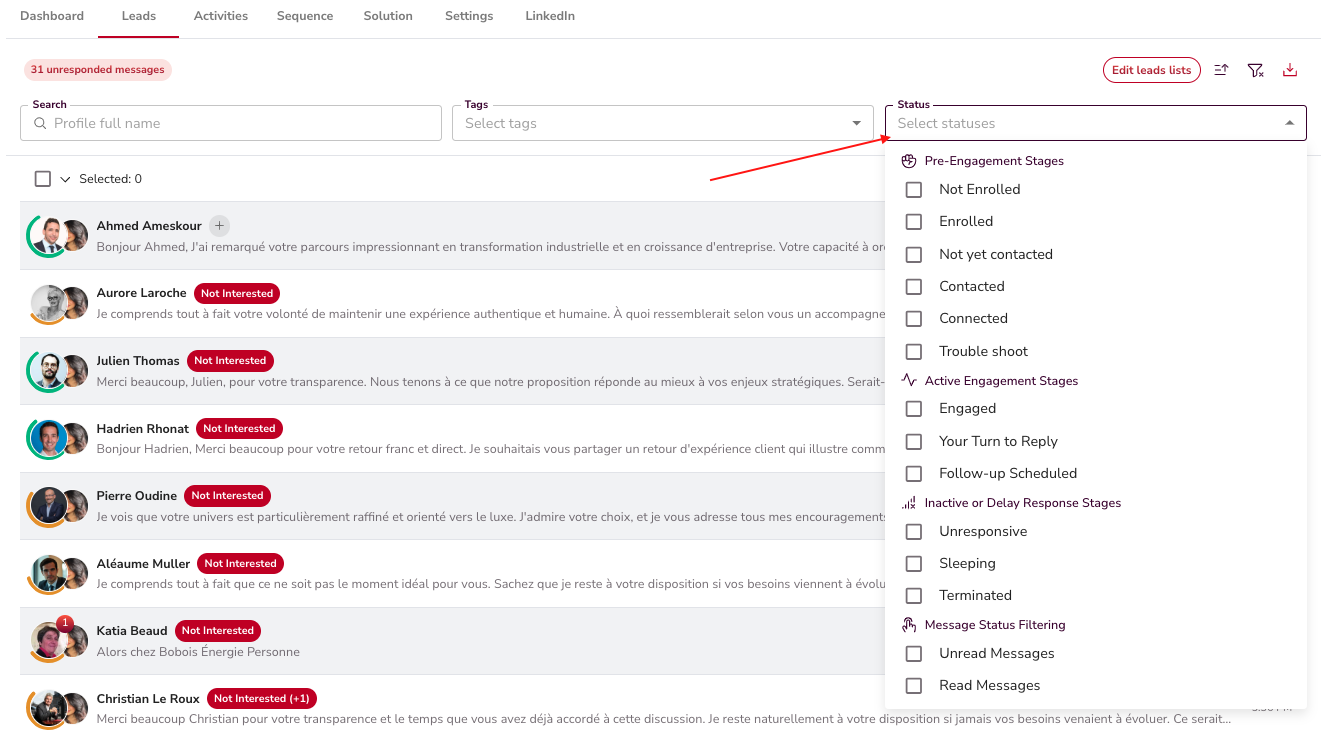
Statuses show the stage where a prospect is.
Qualification
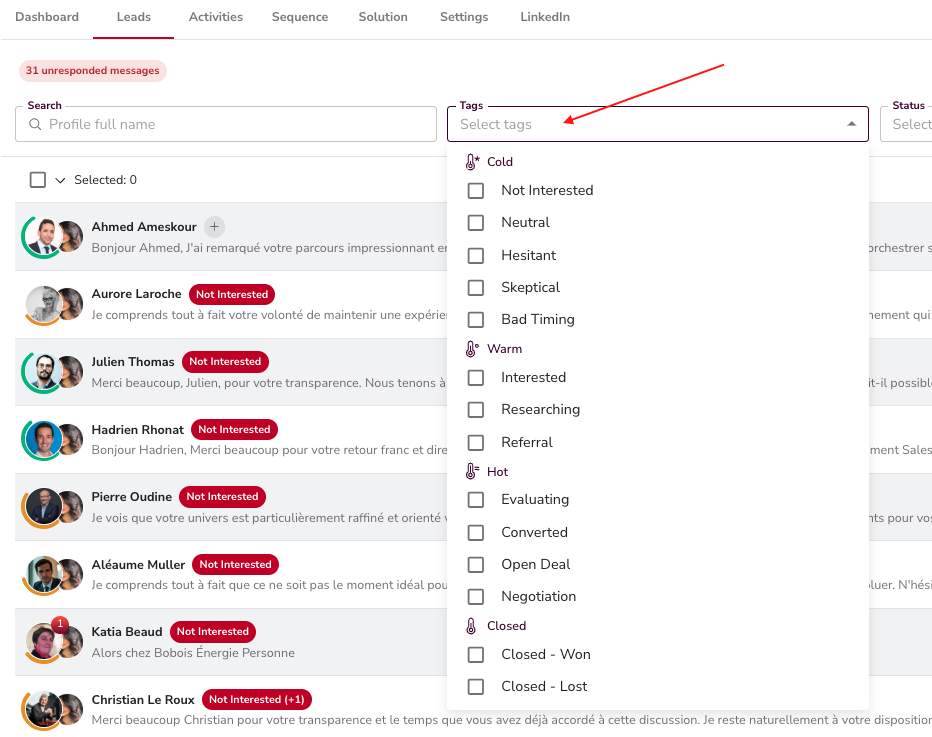
"Interested" leads are identified automatically.
8. Your Daily Routine
✅ Check your inbox regularly.
✅ Respond to leads tagged with "Your Turn".
✅ Everything else — campaign setup, outreach, targeting, and autopilot replies — runs in the background.
That's it! Your campaigns are live. Handle the conversations flagged for you and watch the leads come in.
Key Takeaways
- Start with Account Setup and create your account.
- Create and configure an Agent — your main workspace.
- Add as much information as possible to your Agent (LinkedIn company, Tailored Sales Playbook, Brand Tone of Voice, services, and any other resources).
- Outreach rules are set at the agent level and apply to all senders.
- Personas define who you target — aim for at least 3 detailed ones.
- Missions generate multiple campaigns automatically — the fastest way to launch.
- Review the generated campaigns before launching.
- The Inbox centralises all replies — respond promptly to "Your Turn" messages.
What's Next?
You can learn more about the First 7 Days Roadmap and apply it.
Happy Prospecting!